"V3D HDR Master Bundle" (Commercial)
 V3Digitimes
Posts: 3,150
Available here : https://www.daz3d.com/v3d-hdr-master-bundle
As it is the case for most script products, a DIM (or manual) installation is recommended.
V3D HDR Master Bundle is a bundle of three products which can work independently, but which work great together.
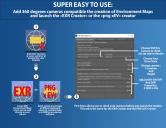
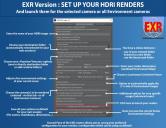
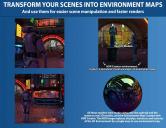
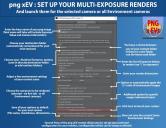
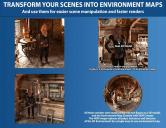
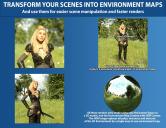
V3D HDR Creator allows you to create very easily HDR Environment Maps from your 3D Scenes, to create base render settings using these created Environment Maps, and to keep a track of them (history). All your settings can be remembered from one session to another to gain a maximum of time. Using HDR Environments instead of heavy scene will drastically ease your scene set up (for instance in super laggy scenes which become super light!), and will speed up your renders. For the main script you have an "exr" version of the tool for a direct hdr render of most scenes - directly useable as environment maps, and for complex scenes using special effects such as fog or haze for instance, a "png xEv" version allowing to render various levels of exposure values in which can be recombined as hdr later on (photoshop for instance).
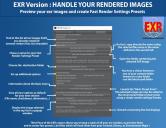
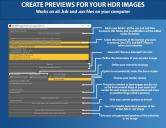
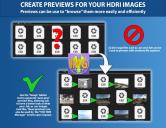
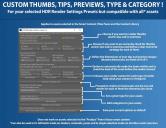
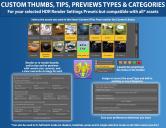
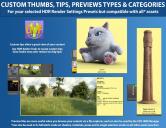
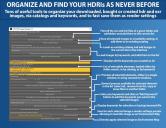
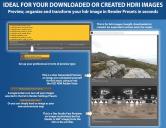
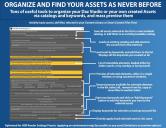
V3D HDR Add-On Tools have two main tools. The first one, for assets (your .duf files), allows you to batch create Thumbs, and/or custom (size) Tips and/or previews (.prev.png files) for your HDR Render settings presets, (or for shaders, or materials, or poses), in a single operation, with options which can be set as default for a maximized efficiency. Other types of assets (props, figures, shapes, scenes) can also benefit the custom tips and previews, but in a one by one mode. The second tool, for hdr or exr images, allows you to batch render preview images for your hdr or exr images, which is very handy for a rapid identification of what’s in your images in your file explorer and for an efficient “drag and drop” of hdr or exr images as environment maps. For the assets you can also set up the type and the category.
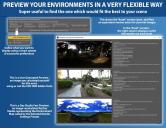
V3D HDR Manager also have two main tools, one for developed for Environment Map based render settings presets (said differently the .duf assets which loads your hrd environments), and one for hdr images (exr, hdr) themselves. A large part of the tool for assets can also be used on any asset (and not only hdr render settings presets). The tool for assets as well as the tool for images both allow you to save the selected elements of a list in new catalogs, or to add them to existing catalogs, and to add keywords. You can then reload at any time any catalog you want (you can reload several catalogs), and load by any keyword you want (you can cumulate the lists you load). Smart previews allow you to preview the assets in different ways (Daz Studio Generated Previews, User Previews –.prev.png – or tip or thumb). You can then load the ones you want in your scene, and, for images, you can batch convert your selected images into render settings presets. It is very useful not only if you are used to download hdr images on the web or used to create them, but it is also useful to transfer your old hdr Daz content (not compatible any longer with Iray), to an Iray render setting environment preset.
You can also find very rapid video overviews with the following links:
- for the Creator : : https://youtu.be/z2dcVvys0q4
- for the Addon Tools : https://youtu.be/lYMCmyxOP8c
- for the Manager : https://youtu.be/z_Kb3T6mUYo
As usually, this thread is here for any questions you would have, or any feedback you would like to share. You can click on images joined here to enlarge.



















Comments
V3D HDR Creator seems very useful for me.
Is it possible to combine different png images (made with the digital camera or in the different program)
taken at different expose values and get HDRI, that will light the scene with it.
What is the maximum resolution of the generated HDRIs?
For the creator you have two different scripts. The first one will make directly a hdr image that you can use as Environment Map (but does not like special effects such as fog for instance), and the second one if you prefer will create several png images at different Exposure values (you just have to enter a list of exposure values in the line dedicated to this purpose such as : "10;11;13;14;15" for instance). Then Daz Studio itself is not able to combine your png at different exposure values as far as I know, and if you used that method you can combine them in photoshop (It's easy and I explain how in the documentation), and there must also be other tools on the web. Then yes, the hdr obtained can then be used as the new environment map too.
The maximum resolution is the maximum resolution you manage to render with Daz Studio I guess. I have not raised above 10000x5000 during my tests (just for a matter of timing), but as long as it can be rendered by Daz Studio it should work higher.
edit : I just checked, my max was 10000x5000 and it seems that DS may limit to 10000...
edit 2 : OK, after checking, the limit size is what you want (I just render a 16 000 x8000 hdr), but if you want to render above 10 000 px you have first to go in "Render Settings", general, pixel size, click on the "wheel", choose "parameters settings", and uncheck "use limits". Then I suppose the limitation is the performance of your computer. I'll think of a way to make everybody aware of this.
Ok, thanks for the explanation.
You're welcome!
What do you mean coming soon ..... it's out now
https://www.daz3d.com/v3d-hdr-master-bundle
It'll make for a very interesting Sunday morning reading and purchase.
Oh wow, I first thought I wouldn't have much use for this, but after reading through the description I realized that I could make HDRIs of all my large indoor and outdoor scene sets and then just deinstall the sets themselves unless I really really need them for detail or such. This is so cool! I'm just afraid that it will take aaaages to render out the HDRIs as they're so big. Can you give any examples of the time needed, with your personal set up? Just so I get a general idea. In any case, brilliant product I think!
You're right, I corrected this. I tend to post not too far from the release because otherwise I'm so despaired when nobody reacts! And this morning I did not have access to my computer until now to correct this (plus my eyes are now too old to correct this on a screen phone - ok glasses exist, but I never remember where they are!)
Happy to see you find it cool. Actually the renders are not really much longer than "normal" renders. I used the scene : “The Druids Cove, a Mystical Scene” with a “Sky or iRadiance HDRi” for the light. This is the scene that you can see in the video link of the creator on the first post (take care the whole video is accelerated cos I've been told people never watch long videos). I rendered this scene in different resolutions, all render settings as default, and here are the durations :
16000 x 8000 = 13 minutes (remember above 10k you have to manually set the render size limits to off, until I update it so that the script asks you if you really want to do that, and does it for you if yes, or maybe I'll just mention it in the documentation, not sure what I’m choose ...)
8000 x 4000 = 4 or 5 minutes
4000 x 2000 = gosh! It was over while I was writing this… Less than 4 minutes then?
The duration will of course depend on your scene (this one is amazing, but hard to handle in my viewport), and if your video card can handle the size of your scene of course. I have a Nvidia 3090, but it is strongly nerfed at 60% or less of its potential (because my computer makes the noise of a sick helicopter otherwise). During the render you don’t have to bother what the progress bar displays in term of progress and of iterations, it is in general not relevant (the first iterations can be super slow then suddenly the render is 100% over and perfectly neat even with a low number of iterations displayed). This does not depend on me so there’s nothing I can do.
I hope these info will help you, I'm available anyway for any question.
Yes, that was super helpful, thanks! I bought the bundle just a moment ago. Hope your computer has recovered!
Lol thanks! My computer is perfect, it did not suffered too much anyway!
If you have questions feel free to come back. I tried to include everything in the documentation, it is easy to use but there are a few small subtilities that you might miss if you don't read the documentation. My first advice : test on one small render first to check you like your settings before rendering huge HDRis!
I just put the bundle in my cart .
I use DAZStudio for many years but never really investigate HDR and how to use it in DAZStudio correctly links for some basic tips would be apppreciate
Do you have an user manual with the jpeg images you put in attachement?
I am interested to using it because i can now draw panorama with Ndvidia Canvas (free app) and saving it in exr format
i have posted a message about it in the common forum
https://www.daz3d.com/forums/discussion/625266/now-draw-panorama-with-ndvidia-canvas-1-4-and-import-in-dazsudio#latest
Enviromnent Maps in Daz Studio are 360° hdr image maps (Daz Studio does not prevent your from using png instead but in this case the result is really poor). I have a user manual I join here but as every user manual it is not fun, I would rather recommend you to watch the video concerning the "Manager" product of the bundle (I think it's at the end of the video, when I convert some old daz hdr content to be assets compatible with iray). With it, if you have a folder (or subfolders) where you store your hdr environment maps, you can "batch convert" them all at once in a content folder (or one by one if your prefer) into basic render settings presets (they will then be duf file in your content loading your images as your environment map, make the dome visible, and with a visible ground). After that, if you want to batch render cool thumbs, tips (and previews) for your enviromnent maps, this is made with the hdr creator (in the "addon" video mentionned first post).
I don't personally store links to information about HDRis since I've been using them for so long that I don't need it, but I just checked that if you make a simple google search you'll have a lot of information. My recommendation (that's the way I learned it) is to go in the render settings, "environment" group, and play with the different options and dials to see what their influence are).
I did not know Nvidia Canvas, this is very interesting indeed. One more thing : the scripts "Addon Tools" and "Manager" will work for your 360 HDR as long as they are in .exr format or .hdr format (I don't know what format you generate with your tool).
Thank you for the manual.
:) You can also load in via the content library, the menu, the toolbar... It was not a big effort (to also join it here)!
thanks for your comments and manual
I have bought now
Canvas from Nvidia save Exr files (*.exr) equirectangular environnement map and do 360 degrés
here the interface (screen saved)
Wondeful! exr and 360? They should work as Environment Maps without any issue then, so the script of the "Manager" (the one for images in your case of figure) can take all your maps (all the maps in folder and subfolders of a given folder) when you choose this folder after you click on the top button of the interface.You select them all in the list of the popup, you click on the button to Batch convert to base render (near bottom left if I remember well), and you choose your destination folder. If, as the destination folder you choose a mapped content folder (you can add a folder to the list of mapped content folder using Edit/Preferences/Content/Content Directory Manager). Then all the images you created with Canvas so far (and that you processed via the script) can now be loaded as the Enviromnent maps whenever you want from your content library (as normal hdr render settings presets)! (You can refine your settings in the Render Settings/Environment Pane, and resave if you want to). Each render settings preset (.duf file) will use the name of the image map it loads! (If you want nice thumbs and tips in your content library instead of the default thumb applied by the script, you can then select all your new duf presets and batch render more precise thumbs and tips for your assets (everything you need is in the documentation, but is more "visual" in the videos I joined in the first post of this thread - so in your case the Manager video (the end) and the Addon video (the beginning). Have fun!!
What a wonderful product - I have bought the bundle. Thank you, thank you, for creating it.
I have created the EXR map 8000 x 4000 - rendering time: 4 minutes 1.72 seconds
Using that map, I have rendered https://www.daz3d.com/md-steam-red-and-black-carriage
Rendering Time: 1 minutes 35.14 seconds
Wow, these possibilities will keep me busy for the very long time...
Hello! This looks like such a lovely product!
Please clarify - the preview.png that it creates - can it be stored in the same folder as the hdr and viewed in Windows Explorer? I don't want to open up DAZ every time just to see if I have a suitable hdr for a planned project.
Thank you so much!
Lol, thanks a lot for the feedback ! I'm glad you see how useful this is!
edit : I'm coming back for a better answer, I was a bit short of time for my first answer. I'm REALLY glad that you share it, this kind of feebback is sooo important for me. You know, when I spend a lot of time and energy on a project, at the end, I doubt really a lot... And your post is typically what makes me feel better ! THANK YOU for that!
The .prev.png is created :
- for the script working directly on images (hdr, exr), it will automatically be stored in the same folder as the hdr, and it will be viewed in windows explorer. This way you won't need Daz Studio. You can see it in the video demo on 'Addon tools', part concerning the 'image' tool, link to the video in the first post of this thread.
- for the script working on assets (your .duf files), it will automatically be stored in the same folder as your asset.
Feel free to let me know if I have not answered your question (my understanding of English subtleties is far from being perfect...)
This is amazing tool. Now I can render multiple characters on my Nvidia card with 8 GB of video RAM.
You are the best - thank you, thank you, thank you.
Rendering Time: 1 minutes 23.35 seconds
Items used:
https://www.daz3d.com/nabi-and-minjun-hd-for-genesis-9
https://www.daz3d.com/xi-morin-outfit-for-genesis-9
https://www.daz3d.com/dforce-swords-legacy-outfit-for-genesis-9
https://www.daz3d.com/ardamir-hair-for-genesis-9
Oh wow. I dont have a powerful machine yet. I still have a Ge force 3050 ti. So usually i try my best at creating really superb images but with the mindset of putting 1, maybe 2 characters.
But i so have other images that sometimes requires multiple people so if i can save the rendering of an environment, that would be splendid.
Well done V. !!!
The Bundle was an instant buy for me, especially knowing the quality of your UI design, documentation, and support.
This is going to make Rendering a lot more fun...
Thanks a lot for your support Praxis! And long life to Euler identity ! (I hope it's the English name of it), it's one of the most beautiful - magical - formula of mathematics (IMHO!) I hope you'll use it a lot (my product, not Euler Identity lol), and as usually I'm here for any question or support (except at night !)
https://en.wikipedia.org/wiki/Euler%27s_identity
Another example of HDRI made from https://www.daz3d.com/urban-future-6
Rendering Time: 2 minutes 23.63 seconds with 2 Genesis 9 characters.
@Artini : Really cool ! I'm glad you have fun now!!! One tip not explained in the documentation is that here your hdr is a bit noisy, if you want it less noisy, do it just as you would for a “normal” image in Daz Studio : before your launch the script, as a first step increase Min Samples (in render settings, progressive rendering), and activate the denoiser (in render settings filtering, “on” to everything if I remember well).
On my side I think I’m planning an update it so that people don’t have to set themselves the render size limits to off when they render files bigger than 10 000 pixels. I tried a few things this morning and it seems it could work, but I wait a bit before implementation of the update to see people’s feedback and eventual requests.