Help - Transfer Utility and Geografting in Daz3D
 kzmaster2020
Posts: 2
Greetings all,
I need some help. I'm trying to figure out geografting in Daz3D but I'm running into different obstacles.
I created a crude shape for the cheek and tried to walk through the tutorial shown here: https://www.youtube.com/watch?v=_E4r2mKYNUQ&t=108s&ab_channel=Meshology
From what I understand from the instructions:
- First you create the shape you're going to geograft and making sure its border Geometry aligns perfectly with the edges of the faces located on the base model you're going to geograft to.
- Select Your New Geometry > Edit > Figure > Geometry > Convert to SubD
- Select Your New Geometry > Edit > Figure > Transfer Utility (In order to convert the new Geometry to an auto-fitting item) - Set the Source Scene item to your Base Model and Set the Target Scene Item as the New Geometry.
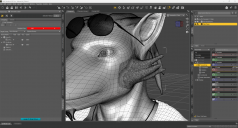
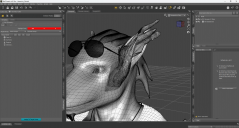
Here's where I run into my first issue. This warps my Geometry and relocates it (as shown in the attachment images). It's also a destructive process because hitting UNDO clears the entire model.
What am I doing incorrectly?
Any guidance would be greatly appreciated.


Screenshot 2024-12-22 194946.png
1916 x 1031 - 983K


Screenshot 2024-12-22 200159.png
1916 x 1028 - 756K


Comments
You shouldn't have converted to subd before rigging the graft... The Genesis figure has to be set as Base Resolution as well.
Then you'll get seamless rigging result. Besides, rigging process cannot be undone... you have to redo it from the beginning.
Edit: Also make sure you export the cut geometry with Base Resolution as well.
As crosswind says you need to model at base resolution, which you clearly didn't do here, and agaisnt the base shape, which you don't appear to have done here - I think it is the latter that is the cause of the distortion as the fitted item is receiving a projection of the morph(s) used to get the character, in addition to having the baked in shape from the modelling.
You would also ned to set the weld and auto-hide groups to get iot to work as an attachment once you had addressed the other issues.
Greetings all and thank you for your guidance.
I was able to resolve the issues related to making sure everything was on the Base level of resoultion before attempting grafting and, as a result, was able to successfully do a basic graft of a spike to a Gen 8.1 model's cheek. (Yay).
However I've made a dozen attempts and have hit a wall when it comes to attempting the same basic test on a model with the morph on it. Applying the Transfer Utility distorts the geometry of the new piece.
Where am I going wrong?
I believe the graft in the 1st screenshot works fine but the one in 2nd screenshot is problematic. If so, you should've used the settings in below ss1 when rigging the graft on the 2nd character, i.e. when rigging on a non Genesis Base figure, you have to tweak the setting in TU dialogue.
However, the standard workflow is:
1) Rig the geo-graft on Genesis Base figure 1stly (what you've done on G8M in the 1st screenshot...);
2) Dial the character's Full Head Morph (FHM) on G8M, fix the AutoFollow FHM on the geo-graft (in hidden properties) in the external modeling / sculpting software... if there's any unexpected deformation.
3) Import OBJ to update FBM on the geo-graft with Morph Loader Pro.
Thank you!
I followed your image to change the settings and the test shape successfully grafted to the morphed figure.
My final question in learning Daz3D Geografting is the New Geometry itself.
I'm afraid I don't quite yet understand how to add more complex Geometry to models (like tails, wings, horns, etc.,).
So long as the outer border of my geograft geometry aligns with the topology of the Gensis model (in Base Resolution), can I sculpt whatever I want on that new geometry and still be able to graft it to the model?
Certainly. You can sculpt / remodel / retopo on the new geometry while keeping the outer loop(s) (at least one loop...) for rigging the graft back to Genesis figure. But with the way of remodel / retopo, you have to unwrap UV to create a new UV Set for being used with the new textures. The geo-graft cannot adopt the existing texture maps from Face / Head surfaces of Genesis figure(s) anymore.
As for the modeling, I recommend a fundamental tutorial from Sickleyield : https://youtu.be/Zm-QCFKowCw?si=ByF42CYbhq8wjsBN