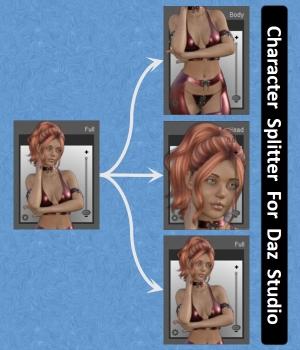
Character Splitter

A 'simple' script and a set of D-Formers to make life easier when creating separate head & body morphs from a full character.
Repository available @ https://github.com/Mike3D/Character-Splitter-for-DAZ-Studio

Post edited by Mike3D on
Daz 3D is part of 
Connect
DAZ Productions, Inc.
7533 S Center View Ct #4664
West Jordan, UT 84084
Licensing Agreement | Terms of Service | Privacy Policy | EULA
© 2025 Daz Productions Inc. All Rights Reserved.
Comments
Thank you, this looks amazing! can't wait to play with it!
Cool!
For those who haven't used GitHub, to download, click on the green Code button, and you can download it as a .zip file...
thanks a lot! very appreciated & useful - i've wished i had sth like this a few times before! ^^
question: i had a look at the readme on github before i dl the zip, seems easy to use (guess i'll stay by just the simplest, normalized or maybe wysiwyg) but is there sth to avoid at all costs, like sth that could mess up the base G figure, or the character supposed to be split - i mean mess up so that it never loads correctly again? i never split anything ever, and i don't create morphs or anything either...
Thank you; I was clueless about how to do that.
@manekiNeko
The only way you can mess something is if you overwrite an existing morph. This can only happen if the Name you choose for your split morphs is the same as an already owned morph, located in the exact same path (same Vendor folder and same Product folder). If you use your own Vendor name in the Settings tab, you're totally safe.
Maybe I'll add a discard/confirm dialog in the future, to warn the user in case of a file overwrite.
@WandW
Thanks for the tip, although it is already mentioned in the Installation instructions, some people may have missed it.
thank you! now that i know what is safe, i can start experimenting with your script ^^
Repo updated. It is no longer allowed to overwrite morphs or to choose labels already in use for other morphs.
Repo updated. Added a new Tab. You can now delete morphs (dsf files & directories, as well as cached data), which can be handy if something went wrong or you need to 'overwrite' a morph while experimenting different settings.
@Mike3D :
Great script, thank you for creating it.
I have a question, and a bug report (with minor fix) if not an isolated case with my rig.
Question; Are you the Daz3d PA MikeD?
Bug Report; The custom Character Map icons (skull-crossbones, checkmark) do not show in the installed script in either the code, or the dialog as opposed to them clearly there in the code on Github.
The copy/paste method does not seem to propagate from the zipped code file to the user's PC (at least in my case -- Need others to chime in if they are experiencing the same).
I get 'Latin Small Letter A With Circumflex' (U+00E2) for all instances in the code for both.
I rectified this (for my copy) by changing all instances for the skull-crossbones with Unicode string ( '\u2620' ), and ( '\u2714' ) for the checkmarks.
Hope this helps, and again, thank you, Mike.
@DaremoK3
Thanks for feedback. To confirm the issue, can you please download & check just the raw script file : https://github.com/Mike3D/Character-Splitter-for-DAZ-Studio/raw/main/Scripts/Character Splitter.dsa
PS: I'm not MikeD and I'm not a PA.
@Mike3D :
Okay, the problem lies with Daz Studio (at the least; ver 4.12.0.86_x64) on Windows 7 x64 -- Does not matter if executed from Content Library, or IDE.
Your code file contains the copied icons, and carries over from download to install (both zipped, and raw file) -- I checked the code file with Notepad++ and they are there from both zipped, and raw file.
It's only when loaded in DS that they are stripped from the code, and not just loading into the IDE. Executing script from library, DS shows only the replaced charMaps in the dialog. I replaced the file in library a couple of times, and direct loaded to IDE from outside of DS and from library several times. All instances, DS converts the charMaps.
Now, you need others who have downloaded and using the script to verify if they have the same issue -- Visually, the skull-crossbones not in the pop-ups or the tab is not a big deal, but since you are using a combination of both for your Success/Errors in the log tab, users might not know what-is-what if DS is presenting the same charMap for both.
Regardless, it was a fun two day code study, and I learned something new with DazScript/JavaScript and the deep rabbit hole with using charMap icons in code. I learned how to fix it from raw code, so thank you, for the education...
@DaremoK3
I've finally replaced the glyphs by Unicode blocks for compatibility purpose, now it should display correctly for everybody.
Thanks again for feedback
Just found this after learning how to do it the hard way. Thanks, it's amazing!
I could never get it to work. It would always fail after ERC freeze.
Blando Calrissian Sorry you've had a disapointment with it. @DaremoK3 I successfully used it on the first try, splitting both head and body on G9 with a dial spun character with the "normalize" option. It wasn't perfect at the base of the neck (the traps sunk in a little) but I can fix it with more dial spinning - the head morph by itself is fine. Considering this custom character, I think the result was good, and this was just the first try ( I did have to adjust rigging to shape manualy ). Anyway, thank you, thank you, thank you for creating this great product with great doc's and giving it away! I've been waiting for a script like this since G1! I'll definitely be using this a lot, to split dial spun characters that were successful in only the head or body shape.
 /peace
@3DmentiaNull Thanks for your detailed feedback and kind words. For your issue with the base of the neck, you can try to assign a lower or upper Reference Vertex (see attached image), maybe I have not picked the best one according to the D-Former falloff. Also can you please elaborate on why you need to manualy adjust rigging to shape. Thanks
@Blando Calrissian Can you post the "Log" tab of the script GUI, as well as indicate which tool is highlighted in the "Tool" menu of Studio before processing (it may be context sensitive). Thanks
Hi Mike3D, great to hear from you! I remember you mentioning what vertex number was used. I just quickly scanned through the manual and don't see how one could change it. I also had the thought of trying the "ITF dev kit for G9 volume 1" head split D-former given away at sharecg.com. - and was wondering what the difference is. Since it was my first use, I was struggling a bit with basic work-flow. But it was odd, loading and zeroing the base figure (G9) then loading the D-former, was easy, but to get the chosen morph active, I loaded a second figure that had the morph to be split, and did a "copy figure" with various options but nothing would copy to the first (G9) figure. So I wound up starting with the morphed figure. Not sure what I did next , I think I did "memorise figure" then zeroed it, then added the D-former, then restored the figure, then zeroed the resolution. Then I split the figure into body and head with "normalised", saved as a morph asset (boy am I glad to have that simple, safe way to do it) and there were no errors in the log. It looked great but when testing with an Aniblock, it was obviously not rigged to shape. Aftter rigging to shape it was a very usuable custom asset! So, who knows, maybe D/S 4.21 was buggin out - I thought I could always copy one figure shape to another of the same generation. Anyway, it's been a real up to know that this can work as documented, saving a ton of time! ( It may be good to know how to do all that manually, but as someone said in a comment to a tut about that "All that just to save a head?")
 Again, many thanks! / peace
Hi 3DmentiaNull, thanks for follow up.
The Reference Vertex is documented in the 4th page of the user manual, and can be modified in the 'Body' tab of the GUI. It's used to tell where to "cut" the head and guess the scaling factor relative to the base figure. I'll add more detailed explanations with captions when I get time, especially for people wanting to use their own D-Formers. And I'll also add a tutorial on how to create your own D-Formers.
Having tested with a rather extreme character (Abominable for Genesis), I now understand what you meant with "sunk traps"
Hi Mike3D, Thanks for the info and more docs will be much appreciated! Your attachment ( with sunken traps etc.) reminds me of my experience using Shape Splitter ( originally X-Morphs, that I call "X-Files", cause of the scary creatures that appear. ) I bought it when it first came out because of the head/ body split capability. It's quite an amazing tool, but I still get confused using it, even when carefully following my own workflow manual. So, I'm really happy to have your script! As I recall, what seemed to help sometimes (in Shape Splitter) was to make the figure to be split the same height as the base figure or at least closer. ( that's what I did in my first try with your script even though I used the normalised option ). Question: Does this script work okay in D/S 4.22 ? (I haven't upgraded yet) I have more questions but I think I should use it some more first, so not to ask unnecessary ones. By the way, I opened that same saved scene and tried again to "copy figure" from the morphed G9 to the base one and it worked - so, D/S 4.21 WAS buggin out, I guess! Thanks for your time
 /peace
Hi 3DmentiaNull, I can confirm that the script works for both 4.21 and 4.22.
For extreme creatures, especially "neckless", maybe we need some custom D-Formers with greater falloff, as regular D-Formers are designed for regular characters. For Abominable, which contains a full morph and a separate head morph, I've noticed that we can get good results by applying the full morph, then setting the head to -100% to offset the head morph and get back Genesis head (unmorphed). That way we have a realistic separate body morph.
Hey Mike3D, Thanks for the reply, I was gonna stay with 4.21 if there were any issues, this script is that important to me! And thanks for the info about setting the head to -100%. I'm not sure how to use that with a dial spun character that has too many morphs in the head to consider. But that's an interesting added approach. Maybe, if the dial spun head is mostly one PA character head morph ( that's bigger than normal, for instance ) dialing that -100% would help? I'm in awe of people, like yourself, that understand this stuff! Thanks again
 / peace
Hi, Just wanted to add that I successfully created head and body morphs for a G8.1 dial spun character this time, shorter than the base figure and having a bigger head, using the normalized option and the suggested vertex. Both morphs are perfect! Odd however, that I couldn't copy and paste between figures again, and had to adjust rigging to shape. But it's no trouble! Thanks for adding such an important D/S function!


 / peace
I must admit that I still don't understand your multi-figures copy/paste workflow
Can you please post a snapshot of your "Log" tab of the script GUI.
In next version, I will :
- remove unnecessary bones (body bones for head and head bones for body), so it may cause even more trouble if something is already troublesome
- perform some additional checks on startup for mandatory plugins, to ensure that they are installed, loaded, activated and enabled
Hi Mike3D, great to hear you're still refining the script, thank you! I successfuly used it again last night, this time with G8f. Perfect result! This time I somehow forgot to add the morphs to split, but then without closing the scene, I did it right choosing different head / body morph names, and it worked as hoped and, interestingly, for the first time in my splits it didn't need rigging to shape. I then used the user friendly "find morph" option and deleted the unneeded ones - thanks for that function! I'm not sure I can post the log (from another PC), I'll try. And, I did wonder about your workflow. Question: Do you start with a base figure, and then zero it, so that when you next add the D-Former it's in the correct position? I assume that's true. So, the next question is: How do you add your morph(s) to be split? The only managable way I could think of to add my many morphs (a dial spun character) was to have it loaded in the scene, a separate figure, then copy and paste it to the 1st one (which normally would work) but it's been failing. So, my workflow is: 1) Load my character to be split. 2) Memorise figure. 3) Zero figure. 4) Add D-Former. 5) Restore figure. (sometimes I've also zeroed resolution) 6) Have the figure selected, open and use script as instructed. The only issue has been the missing rigging adjustment, which is only another click. Wishing you a great day! / peace
Thanks for clarification, now I understand what you're doing. If you want to keep things simple and accurate, you :
- start with an empty scene
- load your base figure (step 1)
- zero it to prevent corrective morphs and other properties defaulting to not zero from being applied twice when using the script (step 2)
- apply your D-Former (step 3)
- dial in as many morphs as you want (step 4)
-.at this point you can save your scene if you want, before using the script (steps 5 & 6)
If you've already built a complex character with many morphs and don't want to re-create it from scratch :
- go into the Parameters pane, click on "Currently Used" and set corrective morphs to zero (for example, there are 3 corrective morphs for the eyelashes in G8F)
- File > Save As > Shaping preset to save your character as a Shaping preset (note where you save it as you will have to apply it later)
- use generic workflow as indicated in the previous post, except for step 4 where you will apply your shaping preset instead (browse to your saved preset and double-click on it).
Note that this is only a workaround, some unwanted properties might still be stored in your final morphs, although not noticeable.
Version 3 available
Changelog:
- excluding head bones for body morph and body bones for head morphs
- addded tutorials for D-Former creation and 'Reference Vertex' use
- added checks for mandatory plugins on startup
- added checks for D-Former number of vertices matching base figure
- 'normalized' becomes the default mode (previously 'WYSIWYG')
- updated user manual (added plugins page)
Mike3D It seems I didn't know the usage for a shaping preset or the process to create one - many thanks! However, I did another successful split with my concept, but again not including adjusting to shape. And i'm gonna try to upload the log and a pic of the unrigged result - I call it "Dali spun" ( not an actual representation, but with lots of smoothing and posing, for fun - much better than my attempts at realism : ) And wow, thanks for spending more time on this, looking forward to Version 3! / peace P.S. WARNING: NUDITY ALERT!
If you did not adjust rigging to shape, the mesh won't move properly with the bones. Your image looks like an exagerated case of that issue.
Hi Gordig, Thanks for being a consistent poster to the forums! I'm primarily turning out abstract art and I love surrealism, i.e. Salvador Dali. When I'm testing a 3D figure with an aniblock and it unexpectedly "explodes" because it isn't rigged to shape yet, (though easy enough to fix in the default adjust rigging to shape menu options) I always see the "Dali" in it. But this time I finally decided to work with it and had a good time posing nodes so that they would be even more distorted but still referencing the human form - and of course added lots of smoothing. And, unlike my usual attempts in the GIMP, for example, having a creation in 3D gives so many more options! So, dial spun, but "Dali" spun, seems more appropriate. Hope it isn't too scary, like a lot of surrealism, it has an uncomfortible aspect also. I think, when a person aware of figure rigging looks at this picture, it's at least initially seen only as a mistake. Even for me, can I just look at the form, the positive and negative space? The fact that it's a distorted human figure gives it a whole extra level. And I still think it's worth looking at (made you look). And that's my review of my first ever shared artwork on the web - I'll give it


 just for my willingness to share.( trying to have an artist ego ) Have a wonderful, if also somewhat surreal, day! / peace