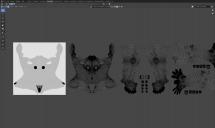
How to perfectly merge the Gen UV Map into the original UV?
I am using Genesis 8.1 + additional Nipple and Genitalia.
(and Diffeomorphic)
In Blender their textures are displayed fine, but the UV maps are separate.
So, I want to combine the UVs of the Nipple and Gen parts into the original Torso UVs.
After selecting Nipple and Gen UV, I tried the following, but there was a problem.
* Merge by Distance : topology inside UVs is messed up
* Stitch : The original UV is deformed, and the anus part is divided in half, so the mesh is stretched
How do I perfectly merge the Nipple and Gen UV maps into the original with no original UV deformations or errors?


9335.jpg
2416 x 1440 - 857K


9334.jpg
2560 x 1296 - 626K


Comments
setup > finishing > merge uv layers
advanced setup > materials > collapse udims
Thanks for the reply. Nice to see you again Padone! :D
After collapse udims, it became like the image on the left.
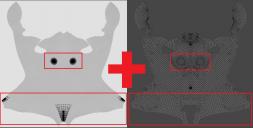
Actually I want to merge the UVs like the image on the right.
However, in this image, they are simply UV moved (G-X-1), not merged.
Even these vertices are slightly mismatched.
In this state, I select the seam vertices of Gen UV and run 'Merge by Distance', then they become one UV, but a fine flush occurs at this seam.
So, I want the below:
1) As in this image, Nipple and Gen UV fit together with Torso UV to become one UV,
2) At the same time, no flush occurs on the mesh
I'm still looking for a solution, but haven't found one yet...
As I understand it, with collapse uv you can see the torso uv map alone if you select the torso. Then you can merge or edit seams as you like with the uv editor. Odd that there's any though.
I figured out the cause of the problem.
The problem was the wrong material assignment!
After merging UVs, I removed the existing UVs, and in this process, materials were automatically reassigned and a flush occurred.
I wasn't expecting the material to be automatically reassigned.
Thanks for your help.