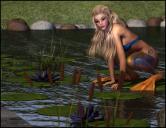
AUGUST New Users Contest WIP Thread
 Jaderail
Posts: 0
This thread is intented for you to show your work as you go, and for you to get feedback and advice from others. This is were we want you to show your possible submissions for the contest and to the members of the forums. Feel free to post your work and ask for advice and tips as you go. Feel free to ask for advice on anything, not just DOF. Need help with your lights? Feel free to ask. Many people will be popping in during the month to help you as you go along.
To get things started and help you as you go this month we have provided these links to get you started. Pick the ones for your favorite software and you shuold be ready to try DOF in no time.
Daz: http://digilander.libero.it/maclean/DStutorial.htm
Daz: http://www.sharecg.com/v/52258/browse/3/PDF-Tutorial/DAZ-Studio-Tutorial-Depth-of-Field
Poser 5: http://www.keindesign.de/stefan/poser/dof_p5.html
Poser 6/7: http://my.smithmicro.com/tutorials/2297.html
Poser 6: http://trekkiegrrrl.dk/DOFtut1.htm
Poser 2012: http://www.youtube.com/watch?v=yNTpR_qiA1Y
Bryce: http://www.daz3d.com/forums/discussion/3855/
Bryce: http://www.youtube.com/watch?v=8WTYURTvXkw&feature=player_embedded
Carrara: http://www.youtube.com/watch?v=gliniNqq8_k
"We would like to thank Jack Tomalin who has graciously decided to sponsor this months contest" He will be awarding a special prize to the winner of this months "DOF "contest. To view some of Jack Tomalin's items please see his store front here Jack Tomalin DAZ Store
To give you some Idea what DOF can do, here are some images that use DOF. We have provided one from each of the featured programs.


Comments
DOF and Final Renders. Tip of the Day:
This Was Provided by Szark. Let's all thank them for the help.
When you have your DOF set up and it is time for the final render pay close attention the Pixel Samples X and Y settings in the Advanced Render Setting pane (refer to the images below). The default is 4 and with the changes made in Daz Studio 4.5 these should be good for most purposes. Pixel Samples X and Y are mainly there for anti-aliasing but comes in to play more with DOF. When it comes to DOF these need to be increased. Refer to the low quality render below and look at where the pixilation occurs, the arrows will guide you. :). The Maximum in DS4.5 is 16 samples. The maximum used to be 64 in Daz Studio 3.
In conjunction with increasing the Pixel Samples X and Y, also increase the Shading Rate quality, lower being better quality. 0.2 should be good enough for most images but you may have to lower it more in some cases. All this super sampling will take care of the pixilation that can occur with DOF.
Super Sampling: This is when we tell the render engine to sample a pixel a number of times which results in a cleaner render. The higher the quality we set the more samples are taken the better the image may be. Yes I said “May Be” better as it most cases increasing the quality higher will just take more time to render with very little increase in quality. The real super sampling is needed when we use advanced lighting and surfaces shaders etc.
So in the Final render below with the Pixel Samples at 16 means the render engine is taking samples of one pixel 16 times on the X and Y axis of the anti-aliased edges.
This relationship between DOF and Pixel Samples depends on the Value of the F-Stop. The higher the F-Stop Value the less blur which requires less Pixel Samples. The lower the F-Stop value the more blur which requires higher Pixel Samples. Since I had a low F-Stop value of 10 meaning more blur (see image below) I used the Maximum Pixel Samples X and Y setting of 16.
Notice I also increased Shadow Samples to 24. This is because I was using soft shadows. The softer edge to the shadows needs more Shadow Sampling. 16 to 18 in generally good but since this image only took 15 minutes to render I set it to 24 to be safe. :)
I found this helpful in regards to Render Settings: http://rubicondigital.host22.com/index.php/articles/poserdazstudio/4-optimising-render-settings-in-daz-studio
Thanks Jad and Szark for this tip and the example.
This is fun :-)
We hope everyone finds it as much fun as you do Sasje. Depth of Field is one of those little things that can really help a render sometimes. And it's built right in to DS, Poser and most other programs. I hope to see some fun images this month.
WooHoo!! Yay-Yay for DOF!! Can't wait to see what you guys come up with this month. Good luck to everyone! :)
I did this one about three months ago and haven't played with DOF since. I can't enter this because it has allready been posted in the old forums.
I would love it if you all could pick it to pieces and point out where I went wrong.
I was trying to get the focus on the mans face and the gun.
That's pretty darn good version3. I do see just a few things that might have made it better so here you go.
If the focus was more on just the mans face and not the gun and face, with the camera angle giving a full view of his face that would help.
If the DOF was sharper so your background faded more it would also give the image more impact.
I would also have expermented with lighting more. Lighting and DOF together can really pop things and make them stand out. High lighting just the action and having lower lighting for the rest of the scene would help.
Just my two cents.
Thanks for the tips Jaderail, as usual, you point out things I never thought about. :red:
I don't care how good some may think they are. The information you get from other users is priceless. There is always room for improvement. I know I'm always wanting input on my promos.
Totally agree. One reason why I gave JAderail one of my older Bryce renders as an example. If I was to do that one now, I would do it differently. I have my camera focused on the front dragonfly, nowadays I would probably focus on the one a bit further back.
My tip for this months competition is for people to check out lots of online photographs and make a mental note of exactly where DoF is most prominent in photos. There are very specific technical and physical reasons why DoF can be utilised in photography and certain constrains in photographic optics that can make avoiding DoF issues impossible... which is why we all need to learn how to use them to the best advantage. :)
Cool, depth of field! :) That's something I've grappled with a few times, sometimes with pretty good (albeit rather grainy) results--like in my July contest entry (http://www.daz3d.com/forums/viewreply/56704/) and sometimes it turns out like the render below...let's consider this a lesson in what not to do. :roll: To add insult to injury, this render (at 2000x2000 pixels) took a full 24 hours. Imagine my disappointment when I saw the results... I may not have learned much about depth of field from that experience, but at least I learned about the value of test renders (and rendering to a new window rather than a file).
Edited to add: to clarify, this is not a WIP for this month's contest. I'm not asking for advice on how to fix it (although if anyone has advice of this nature and wants to share, by all means feel free). I'll be working on a different project for the contest.
Here are a couple additional tutorials I've found that may be helpful for those using DAZ Studio:
http://greywulf.net/2010/02/easy-depth-of-field-in-daz-studio-3/ (lots of good tutorials at this site)
http://docs.daz3d.com/doku.php/public/software/dazstudio/4/userguide/projects_quick_and_dirty/tutorials/tutorial_the_temple/start This tutorial mentions DOF but doesn't go into the details. Still, the tutorial is interesting, and the finished render is a great example of DOF in DAZ Studio.
Oh, I almost forgot...thanks, Jack Tomalin, for sponsoring the contest! That'll definitely add even more incentive for people to enter and give it their best shot.
I try to make a baby portrait.
I never done this before the DOF, so I hope I do it right.
With the camera, I used the top view so I can see it better. :)
No post-work only Daz.
TIP: The value of the Camera's Focal Length (mm) can increase or decrease the distance between the two DOF planes meaning you can have either more or less in focus.
So by decreasing the Focal length (mm) you get a wider Depth of Field where more will be in Focus and increasing the Focal Length (mm) will make the Depth of Field a lot more narrower and remembering the amount of Blur is controlled by the F-stop, Lower more blur, Higher less blur.
Obliviously when you are adjusting the Focal Length of a camera you will have to re-zoom the camera in or out depending on what value you choose.
OK I've made this short DOF video tutorial for the Bryce users - it might be of some help. It covers a bit of boring old theory and then goes on to show how to make the following image - about six minutes "work".
Bryce Depth of Field effect - a 15 minute tutorial by David Brinnen
Feedback is welcome,
Oh wow, thanks for that David. Very kind of you.
To all who don't know, David's tuts are the best. imo.
Thank you and you are welcome, Pam - also, I do requests, so long as it is not for "animation" - for animation I'd try and track down Oroboros on the Bryce Discussion forum, he has some very good tutorials and advice on offer. And for lightening seek out Horo and for getting DS to talk to Bryce you need to look to Rashad Carter. But otherwise, as I said, I'm open to suggestions.
Thanks, Jaderail for your advice on my example of DOF-gone-wrong, and thanks everyone for the tips and tutorials. I have a good concept in mind now...but I'm wondering if my poor single-core processor can handle a scene with six to ten Genesis figures plus DOF plus a shader rate of 0.2...might require some compositing, I don't know.
Well, I'm sorry I can't offer any help to DS users with slow computers, but I can provide a tip for those using Bryce. So here then is an appendix to the previous video that shows you how to achieve a very similar DOF effect in Bryce but tailored to the limitations of a single core processor.
Bryce Depth of Field effect - for less powerful computers - a video tutorial by David Brinnen
Total render time for the first image was about 30 minutes.
Total render time for the second image was about 1 and a half minutes - distributed over three renders and combined in PSP8.
Hope that helps out some of you with slower computers.
Thank you David . That will be a huge help to our Bryce users.
Oh My YES! Thank you David. I'm sure you just helped make this a great contest for all.
I wasn't going to even attempt this, but I have been learning how to use Bryce and had a scene I had managed to do so applied the DOF to it. Your comments would be appreciated. I will then decide whether to enter this competition or not.
wilmap that image is what this is all about. It's good, it does what the contest is all about. And I think you should really get into the contest. All you can do is get better and maybe even win.
What? No love for Carrara? Carrara has a built in DOF function as well. ;-)
I know this contest is about the DOF in your render camera, but there are also ways- maybe even faster ways- to get a nice DOF other than from within your 3D program. Carrara Pro has different "passes" you can render. For DOF a good one to use is a depth pass, which can be used in Photoshop or other graphics programs as a mask.
Please forgive me if I use the wrong jargon for this: In the following example, I set Carrara to render the image and a depth pass. In Photoshop I pasted the rendered image so that I had two layers. The top layer I added a layer mask and pasted the depth pass into it. I had to invert the image so that black was white and white was black. The bottom image I used a gaussian blur of three or four pixels. I did have to do some brightness and contrast adjustments to the layer mask depth pass to get the dramatic effect I wanted. When I was happy with the look, I flattened the image and I was done.
The first picture should be the final postworked DOF image, the second should be the depth pass (not inverted), the third shows the untouched, as-is rendered image.
The only reason we appear to have no love for Carrara is that our normal CV Carrara expert isn't around at the moment, for personal reasons, so we couldn't get him to add his input when Jaderail was putting this contest togehter.
Any comment on how I could improve my render? (see Post 24)
Render is good, but I personally think that meybe your camera setting needs tweaking. Can you do a screen shot of your camera screen so we can see what you have it set at.