Daz 3D is part of 
Connect
DAZ Productions, Inc.
7533 S Center View Ct #4664
West Jordan, UT 84084
Licensing Agreement | Terms of Service | Privacy Policy | EULA
© 2025 Daz Productions Inc. All Rights Reserved.
Comments
~ And Thanks Kindly ~
Thanks, great to see you back on the forum as well !!!
great render and terrific narrative - a narrative is worth a thousand wors - and as Ub said "Welcome aboard" :)
@Bunyip02 and @UnifiedBrain - @Diomede et @FENgari
lovely use of that lighting setup all- FENgari - looking particularly aesthetic
@Dartanbeck - terrific tutorial - hall of fame stuff
choice stuff Wendy - care to give us a few clues as morsels as to how you did that? :)
the title made me laugh :) nice to be subtle
ha ha excellent :) l ove the caption as much as the movie excerpt you posted "Die humans, die!"
a fine piece of humour shows a fine brain :)
ed3d its heartwarming to see something built up from scratch
me too sorry to be away work and mum in hospital :( she's out now
ah thanks for the blow by blow description - that's extremely helpful
nothing complicated, just plonked the fog into the room and played with the parameters (it has a few more than original Carrara fog)
~. alrite , then _ thanks kindly .~
Thanks for Stezza I found the right plugin (already installed on my system - Doh!)
New work - The last thing I saw...
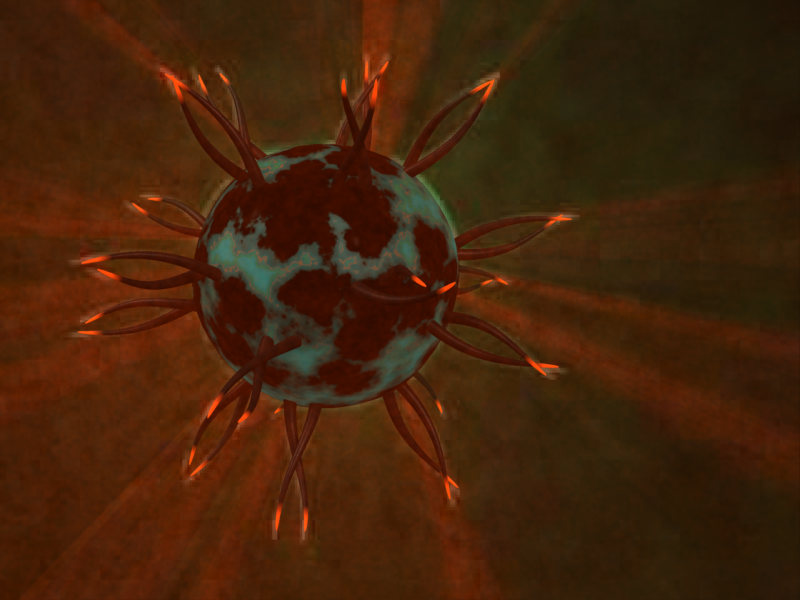
HOW WAS IT DONE...
Used the Duplicate On plugin to add vertex-modelled 'arms' to a sphere and shaded to suit. Moved the camera in slightly and rendered a small 160px jpg image (I wanted it to pixelate quite badly) which I used as a background map. Moved the camera out and added two spots with foggy light cones of green and orange. No need for external NPR filter, you can do it in Carrara...
Thanks, HW! Glad that your Mom is out of the hospital.
An intriguing render, thanks for the explanation. Are you going to enter it?
Title; She's a Daydream Believer
Used light set from the Luminance.
set the sky brightness to 50 percent. turned on full indirect. gama correction 2.2
added several hours to the render
hair is from the native content hair samples.
and a new draft of the 8.1 preset. a few more tests, then i'll share the presets.
@FENgari - re: storytelling thanks, it's what drives me to make 3d art. HEY - we have something in common then, I took a break from 3D between 2017 until the end of last year. So I am also refinding myself. What becomes apparent to me is that the standard of the 3d models for sale continues to improve. This allows attention to detail - in quality. I have just gone through my entire run time again, adding the new stuff - only to find I can replace older models with newer improved ones. Sometimes taking a step back allows you to re-kindle your first love. I'm full steam ahead on 6 additional film scripts now, all with 3d scenes made possible thanks to the artists on Daz 3D and similar sites. Happy days.
Sounds like you're having a ball Sci Fi Funk on Youtube! I don't have as much time on my hands to truly indulge myself, so I look forward to seeing what others are doing and get inspiration whenever I can...
title: Lex Luthor tee hee
used another of the Luminance presets.
a feeble attempt at a skin shader
Michael 8.1 on the g8.1 preset.
wip of the skin shader. put the normal map in the bump channel. ao map in the highlight channel. sssmap in sss channel
couldnt guess where the r map goes.
Reflection?
i never understood putting reflection on skin ??
Risky Business. My third entry into this thread. Not had much chance to be near the pc wih work commitments but yesterday managed to buy Stonemasons Streets of Steampunk at a bargain price so had to use it. Ive got a fake GI set up, a spotlight above for the lightrays, bulbs and spots with lense flare for the car and two volumetric clouds to add atmosphere.
@Headwax (late reply) - thank you for your welcome.
Your 4 x entries at the start of the thread will be among the top contenders I am sure. Your use of the film noir technique is very good with the last of the pictures the strongest (for my taste), also the sky and stretched lens in picture 3 makes that picture a cut above - the lens (I'm guessing, or are some elements "bent" for effect?) is being used to give the picture a sense of speed . Great stuff indeed.
"Watching the Sunset"
Octane render, no postwork. Vlad was used as starring.
2ND ENTRY - Currently a WIP.
I've wondered in the past what that old set called "The Pit" would look like if you ripped out the middle, and extended the height, plus gave it some dramatic lighting.
I'm also pleased with the camera angle I've found. I tiltled the Y axis by 1 degree which will make more sense when I add the characters. Other light notes - I played with the sky setting to whiten it, and added extra exposure to allow a little light to creep into the indirectly lit lower section. The blue emitter lights (It's an Octane render) add just a touch more light and give it that blue rinse. The only light making it to the foreground is a yellow emitter with a decent amount of bloom, glow, and glare - so thats post processing - although it's all one pass within Octane. (No layering). Finally only 1200 samples - so the final piece should allow more light in below, but not much more.
Tomorrow then - the characters and hence - the drama!
Those aren't entries. They are past examples HW provided to illustrate ways in which lighting could be used in the Challenge.
Pit looks good so far!
Misty, thanks for once again working to get the new characters into Carrara.
Freelight, great noir-style mood, happy you like to post big images. :)
Vyusur, terrific reflections and lens flare. Was the ocean and sky an HDRI?
Keep up the great work everyone. Here is another classic cinematic effect.
Spotlight aimed at white cube. Used spline modeler to make the crude logo to cast the shadow. Enabled light cone for the spotlight;
Hopefully more time to comment in a few days or so.
FENgari - another awesome render, love the red tips on the hairs
Misty - excellent work on the Presets, will definately be using them.
Freelight - love the atmosphere in your new render
Vyusur - superb composition in watching the sunset !
Sci Fi Funk - looking forward to the drama being added....
Diomede - Holy Batman !!!
~ And more WIPs
@UnifiedBrain - Ah ok. Thanks for letting me know about the 4 entries. re: pit - thanks - working on the background characters today.
@Diomede - That spotlight is working well with the cone and join to the projected image.
@ed3D - I'll be interested to see what you have in store with the lighting for this laying in bed image. Composition coming along nicely.