Kettu's free stuff: lights, tutorials, etc
 Mustakettu85
Posts: 2,933
Hi everyone,
My lights, tutorials and shaders are for 3Delight. Other stuff is renderer-agnostic.
Here are my best freebies so far, please enjoy!
- Mk85 Fantasy Lights and Portrait Add-On (extensive documentation included with each archive; Portrait Add-On optimised for GC on, gamma 2.2!):
http://www.sharecg.com/v/74356/gallery/21/DAZ-Studio/Mk85-Fantasy-Lights
http://www.sharecg.com/v/76371/gallery/21/DAZ-Studio/Mk85-Fantasy-Lights-PORTRAIT-ADD-ON
- a step-by-step walkthrough of using Shader Builder to get a nifty environment light shader "Envlight2" supplied with 3Delight standalone to be used in DS (I hope this tutorial is informative enough to facilitate your further endeavours into converting any other RSL shaders you may come across):
http://www.sharecg.com/v/75671/gallery/3/PDF-Tutorial/Alternative-Image-Based-Lighting-in-DAZ-Studio
- a 43 page "treatise" on subsurface scattering (and related stuff) as found in the UberSurface family of shaders; lots of pictures and examples (this is sort of a magnum opus of mine):
http://www.sharecg.com/v/76566/gallery/3/PDF-Tutorial/Subsurface-Scattering-in-3Delight-for-DS
- a companion tutorial to the SSS treatise about making opacity masks from pre-existing diffuse maps (remember: for render-only (non-product) usage, unless you have explicit permission to redistribute derivative works from the texture):
http://www.sharecg.com/v/76562/gallery/3/PDF-Tutorial/Creating-masks-from-diffuse-maps-in-Paint.NET
- a simple head cover for the Genesis figure family, used to grow LAMH hair on, with three example presets:
http://www.sharecg.com/v/84596/view/21/DAZ-Studio/Mk85-CapForHair-plus-LAMH-presets
There is also a little more stuff in my ShareCG account, feel free to browse the gallery =)
Small non-ShareCG freebies:
Two painted HDR maps for lighting (CC0 licence!)
A scene with shader mixer indirect lighting
A fractal texture (Rendo freestuff)
Small script for randomly moving selected items around
RadiumCatcher - a simple shadow catcher for use with wowie's AWE shaders
I am willing to answer any questions you may have, but please bear in mind I am not online every day - I am very sorry.
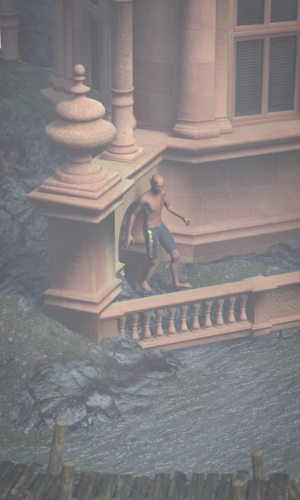
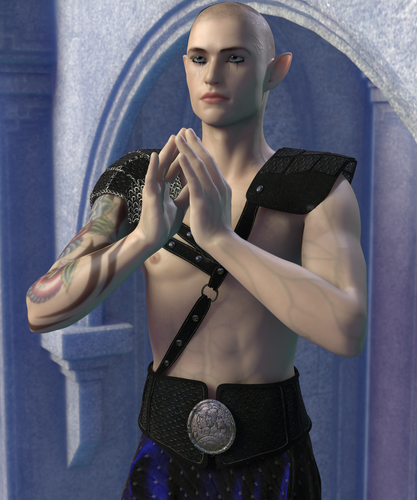
These renders showcase my SSS techniques and the lights: the portrait is done with Fantasy Lights, the water scene - with the environment light shader Envlight2 (and AoA's fog camera for the haze). You will find material settings described in the SSS tutorial.
Thank you very much for taking a look! I wish you a lot of inspiration and awesome renders!



Comments
Hi again everyone,
Thanks a lot to everyone who downloaded and/or rated my stuff, or followed my account! It is much appreciated.
Daukkuuan on ShareCG asked for a material preset for Example 4 from the SSS tutorial - the one that uses default Bree textures for G2F.
Even though the aim of this tutorial is to actually free DS users from relying on material presets and the like, I figured this might be helpful to other people as well.
I have uploaded a file here:
http://www.sharecg.com/v/76578/gallery/21/DAZ-Studio/SSS-Tutorial-companion-preset-for-example-4
Unzip this archive into your "Content" or "My Library" folder.
In the "Presets" folder, find the "Mustakettu85" one. There are two DS files:
- Mk85_Bree-Example4.duf : a material preset for G2F corresponding to Example 4 from section II.2 of the tutorial, with one difference: eye reflection uses Omnifreaker's Park HDR map that comes with DAZ Studio;
- PixieLight.duf : a scene subset with the lights used for Examples 4 and 5. For the IBL maps to work, you need my Fantasy Lights (see the first post for the link).
Remember to turn gamma correction ON in your render settings and set gamma to 2.2, otherwise I do not guarantee the outcome!
Important: please check the gamma correction settings per map in the Image Editor! DS somehow saves them wrong sometimes. To do this in the most efficient way, select in turn Templates 1 to 3 of your G2F and open the Image Editor for the following maps:
- diffuse colour: gamma should be "0";
- specular strength: gamma should be "1";
- bump map: gamma should be "1".
Diffuse colour is also loaded into SSS colour, same as the specular map is loaded into the strengths of both speculars, but you only need to set the gamma correction once: DS will update all channels using the same image.
This information is included in the archive in the Important-Readme.txt file in the same folder.
Thank you very, very much!
Thank you very much, i didn't have time to download it but i will as soon as i have some time. This looks really good.
Thank you so much for this share. Great job.
Thank you for these links and products. :D
I really appreciate these lights, lately I've been working to find some good light set ups for Studio that have a particular look that I am aiming for. And these are just gorgeous, and are actually really easy to set up.
From a stubborn Poser user, thank you for these. :)
Thank you so much !!
Thank you very much everyone! I'm glad you are enjoying my releases!
I figured this would be the place to post this. I renamed Genesis' surfaces and attempted to use your bree settings on her and well... I got some weird results. Yeah and I made sure not to replace the images. It's just... odd. Is there some difference between Bree for G2F and Bree for Genesis that I'm not aware of? The first pic is G2F. The second is Genesis.
To tell the truth, I never tried using G2 presets with G1 by renaming its surfaces, so I can't tell for sure. But it actually looks like you are applying Bree's dedicated "SSS colour" map somewhere, and you don't need it.
If you look close at the preset I released, the original diffuse map is plugged into SSS colour (because in reality, a photo of a human being already accounts for the SSS in his/her skin and underlying tissues, where applicable). If you open the tutorial at p 27 and read on, you will see all this explained.
The preset represents the "SSS-driven" technique, where we only use diffuse sparingly, if at all; while DAZ artists were using the "oldschool" diffuse-driven technique (see p.25 of the tutorial) when they designed Bree's maps, relying mostly on diffuse for skin colour and using those dedicated "SSS colour" maps to add even more "blood" to the nose and ears. Those hand-painted SSS colour maps are exaggerrated and will not give you the same look as using the diffuse photo-based map in the SSS channel.
I suggest you recreate the G1-specific preset yourself, manually assigning maps and setting up strengths and colour multipliers, step by step. It is a good practice. Use p 42 of the tutorial for tips on how to select surfaces for performing this task with the most efficiency. Page 34 lists the same values that are used in the preset.
Once you master this, you will be able to recreate this "soft" look with any texture set, for any figure. Yes it's a bit more work than simply using load-all presets, and then you will have to factor in geometry shells (p 18) for brows/makeup, but the results are well worth it, I daresay.
And you can always save out your own presets =)
And it also looks like the diffuse map for the iris material got lost somewhere in the conversion process. You can apply it manually, too.
Thank you very much for this superb light shader! Great tutorial, easy to follow even for less experienced users like me.
I maded a few alterations:
in the Macro Block Editor under the "Initialization Code" Tab I changed the formula on the very last line from "CI *= %2%" (that %2% stands for "Intensity" in this case) to "CI *= %2% * 11". (See picture 1 below).
That way you can leave the default values in the "User Parameters" for Intensity at 0..2 for "Range" and 1 for "Value" and "Default" alone and let them "Display as Percent" properly. An intensity of 11 seems to match the intensity of the UberEnvironment2 at 100% very closely, so if one wants to swap it with an EnvLight2 instead (and who would not!?), he can copy over the intensity value and the IBL Image and render with a more comfortable ambient light shader.
Altering the value for the "Kenv" parameter, wich should act as a multiplier for the Intensity, has no effect because the variable isn't defined in the code... and I have absolutely no idea how to do that correctly.
Next, at the "User Parameters" for the "Color" attributes I marked the tagbox named as "mapable" and from the "Choices" dropdown menu selected "envmap". (See picture 2),
That way you'll get the combined image select/color picker-layout in DAZ Stiudio's Parameters Tab.
At last I did put "Bias" and "Samples" into the "Shadow" Group instead of "Light" and in the Parameters Tab I set the shadow type selector to "Locked" and "Hidden", because if you try to set shadows to "Raytraced" or "Deep Shadow Map" the shader won't function correctly. It has raytraced shadows by default.
I Did a few testrenders, all with default settings, an intensity of 11 (100%) and a sample rate of 64, the EnvLight2 is the only light.
DS Render settings are all at default except Shading Rate, which is set to 0.5:
The first one (Picture 5) uses omnifreakers "OmKitchen_EnvM.tiff" as IBL Image and rendered in 7 minutes 38.72 seconds
The second one (Picture 4) uses DimensionTheory's "SoE-Sunny1.tiff" from the "Skies Of Economy" product and rendered in 7 minutes 52.37 seconds.
The third one (Picture 3) uses the same as the second one and V6 has the transmapped "Thalia Hair" equipped. Rendered in 11 minutes 51.13 second. I prepared myself for a "rendering horror" session on this one and was really surprised how fast it was completed.
I love the way your light illuminates her skin and her leather clothings... and I love the fact that it rendered them that fast and at theese low settings. That's what UE2 and AoA's Advanced Ambient can't deliver.
Thanks again for my new favourite Ambient Light Shader... and the free Shader Builder training! :-)
I vote for that this has to become a essential part of the "Default Lights and Shaders for DAZ Studio" package!
If you look at the macros editor window, you will see that there are variables listed at the top. Each of them is given an ID number - this number, put between two "%" signs, represents these variables further down the line in the macro code. So %2% is, actually, Kenv. If you look at the final "Light Code" tab (between the "Block network" and "Log" tabs), you will see all the intermediate "%"-names being replaced by the variable names you provide in the User Parameters list.
It's a bit non-intuitive, but this is how it works in the shader builder.
"Enjoying" doesn't put it right... I'm nearly ecstatic. :-)
Comparing Envlight2 with UE2 it seems that the UE2 doesn't get soft shadows right, they look always way too dark.
Yeah, I guess I already read about that in the "3Delight Surface and Lighting Thread". Which was the reason I found this one. Couldn't resist the "freebie" remark in your sig! :-)
Sounds very interesting. I thought this was especially for UE2, which I don't really like to work with. Too resourcehungry for my taste, with that Envlight2 shader I can even render with DAZ Studio's default render settings. Some of the shadows get a bit of noise doing that, but that's a thing I can live with. You virtually need to put your nose onto the monitor to notice.
It's a bit non-intuitive, but this is how it works in the shader builder.
Ah, I see. Then I guess my Shader Builder whacked it up somehow, because in my "Light Code" tab it says "Cl *= intensity;".
Which is a bit of nonsense then, defining the modifier for "Intensity" being intensity itself.
No wonder why adjusting the "Kenv" value in the macro code in my build didn't had any effect.
It is for any and all shaders that do GI. I've also tried Omnifreaker's UberSoftLight Kit, and it also works, albeit that shader a bit trickier to set up. Either way, UE2 should "feel like a different shader" when used in the particular way I describe, to only do bounce light for a directional light setup and with GI caching enabled in the raytrace hider. Much less resource-hungry (particularly with hair being excluded from GI via UberSurface).
Using a render script to switch to the raytrace hider (but without GI cache) will speed up any raytracing calculation, so you may want to try it with Envlight2 as well.
Ah, I see. Then I guess my Shader Builder whacked it up somehow, because in my "Light Code" tab it says "Cl *= intensity;".
Which is a bit of nonsense then, defining the modifier for "Intensity" being intensity itself.
No wonder why adjusting the "Kenv" value in the macro code in my build didn't had any effect.
The " *= " syntax is okay. It is a C-style shortcut for something like
It's faster to type. There's four of them:
*=
/=
-=
+=
Were you trying to adjust "Kenv" by directly typing "Kenv" in the macro editor? This may not have worked because it should have been " %2% " instead. In the final code, all the " %2% " instances are replaced with "intensity" (the name you give to the variable in the User Parameters in the rightmost column).
There is a "trick" I often use when coding to make macro editing easier: create a new normally named variable in the code, assign the value of a " % NUMBER % " variable to it, and use the named variable down the line. It also has the advantage of us being able to modify this variable (inputs can't be assigned different values).
Nice. Then I'll definitely give it try!
Were you trying to adjust "Kenv" by directly typing "Kenv" in the macro editor? This may not have worked because it should have been " %2% " instead. In the final code, all the " %2% " instances are replaced with "intensity" (the name you give to the variable in the User Parameters in the rightmost column).
There is a "trick" I often use when coding to make macro editing easier: create a new normally named variable in the code, assign the value of a " % NUMBER % " variable to it, and use the named variable down the line. It also has the advantage of us being able to modify this variable (inputs can't be assigned different values).
Sure, the syntax is correct. But in the original sourcefile the last line of code says "Cl *= Kenv;".
DAZ's Shader Builder transforms this into "Cl *= Intensity;" for to me unknown reason.
I tried to edit the value in the macro itself, but whatever I did put in, 10, 11, 100... everytime I got a very dim render as result.
I tried that and gave the "Kenv" float various unnused %X% numbers, from %8% to %. But everytime I got a different variable for this, being "bias", "samples", etc. "Kenv" didn't show up.
I guess the Shader Builder wanted to die that time. :-)
I did a different aproach (made visual in the picture below):
I made up an aditional controller, named it "Kenv", created a "multiply" operator and let "Kenv" and the "Intensity" controller run through it.
The result in code is "Cl *= intensity * Kenv;", which I guess isn't THAT correct either, but it works as intended without having to hack into the code. As a plus I got a hidden parameter to adjust manually if ever needed.
I also created another controller, "__nonspecular_2" with a value of "0" to "1" and a "subtract" operator, and let "__nonspecular" and "__nonspecular_2" run trough it. The result is a "switch" (with a nudge of 1) in the Parameters Tab where I can switch specular shading on and off.
Before I had two different Envlight2's, one with nonspecular "1" and one with nonspecular "0" because I don't wanted to recompile everytime I needed it differently. I'm a "one shader for every purpose if possible" guy. :-)
Thanks for your help and tips.
This is the correct behaviour. Looks like I am not explaining well enough. I will try once again. Please study the image attached, I hope it makes it clear for you.
Ah, now I got it. Thanks for the further exemplification, Mustakettu.
I didn't notice the original variable's names are overriden by them of the User Parameters.
Makes sense.
I also must correct myself:
I also created another controller, “__nonspecular_2” with a value of “0” to “1” and a “subtract” operator, and let “__nonspecular” and “__nonspecular_2” run trough it. The result is a “switch” (with a nudge of 1) in the Parameters Tab where I can switch specular shading on and off.
Unfortunately, that doesn't work. Seems that the "__nonspecular" parameter is fixed in some way. Changing the value from "1" to "0" via subtraction doesn't have any effect, it doesn't do specular.
Thank you. I'm glad you understand now.
"__nonspecular" is actually an output parameter of the shader (the surface then asks the light for it, and it's the surface that decides if this light will be included in its illuminance() loop or not). I cannot remember right now if RiSpec allows changing outputs like that via shader code, but there is certainly no way I know of in DS to reroute shader code back into the User Parameters where the value for "__nonspecular" and "__nondiffuse" are set. So yeah, in that sense it is fixed.
Hi,, thank you many useful tutorials and stuff,,
I have seldom play with shader builder and now start witth your envlight2 tutoriallI.
aftrer build (just follow your tutoriall ^^;) envlight ,, and test render,,
now I have some (really basic) quesiton :red:
1 I hope to cast shadow from this enviroment light only , then set the parameter, shadow >shadow type raytraced.
but when I set shadow type, nothing illuminate, ^^; It is usuall?
or I must miss something ?
2 If I hope to make same light by shader mixer,, it is easy ?
3 about UE2, right source image not much with enviroment image direction,
then we need to adjust rotation of light soruce,,
this environment light have same problem too?
or If I set env sphere then add environment image.jpg ,
then set light source HDRI for this light, the light direction is same as enviroment image?
or I still need to tweak rotation ?
4 if I hope to add AO shadow (sorry,, shadow intensity controll ^^;)
for this light what may I need?
I better download it before I forget again.
This light shader won't work with shadow parameters set, the "Shadow Type" has to be "None" for it to work. The best is if you set the Parameter Settings for the Shadow Type to "Hidden" and "Locked", so that you can't accidentally change it.
Also, you need to put in an environment map (.hdr, .tif, ...) into the texture slot of the "Color" parameter. It won't work without one. There are some coming with the DS Base Content, in ".\Runtime\Textures\omnifreaker\Environment". If you've got one or some of DimensionTheory's lights, they're shipped with some pretty ones, too.
The shadow intensity depends on the brightness of your environment map, there's no such thing as a "shadow intensity control".
I've added a picture with the basic parameters for the EnvLight2 below. That's all you need, and more importantly, all that works. There's no need to fake darker shadows, the shadow strength you get is what the environment map delivers. If you need darker shadows, just lower the Intensity.
Hi, and thank you for taking a look at my stuff!
I see Stefan has already answered some of your questions (thank you Stefan) . So here are the remaining ones.
2. Nope. Shader Mixer is very handy for making procedural surface shaders, but for other things it is not the best tool to use.
3. The problem is that 3Delight thinks that the Z axis is up. While DS thinks the Y axis is. You could try changing the coordinate system to "shader" and rotate the Envlight2 in the scene to have its Z axis pointing up.
UE2 may have an internal semi-fix for this, but Envlight2 does not. So in its case, rotating the light should work.
Don't forget that DS shaders like UberSurface and DS default have their own idea of the world (see how different the same panorama will look when plugged in these two as a reflection map). Shader Mixer and pwSurface may have their own ideas, too.
Using a default DS sphere as a skydome seems to be the most reliable option for reflections. Use UberSurface on it, disable casting shadows and 'occlusion' contribution. Then it will only reflect itself.
Hi thank you stefan and Kettu:),
I beleive now I can use this env light corectly as it desigend (not guess and try many ^^;)
I may explore more shader builder ,
because I sometimes like "fake" not "like real" shadow, with light intensity keep ^^;
mm,,sorry to ask again, but I hope to clear what I am doing^^;
I have now two question,,,
1. read again what Stefan planed about Non diffuse, and Non specular switch.
it seems same I plan to modify this shader as beginner start,,
then I feel, my copied envlight2.sl there is not "No diffuse" parameter.
When I first follow this tutoriall, I set User parameter>"non diffuse" set defualt value to 0
but not connect it to New Env2 macro instance. (copied from envlight2.sl, because there is no Parameter about no diffuse)
I believe, this value work some like boolen (true and false), then I understand why I need to set it 0,
if I hope to illuminate diffuse. but even though I do not connect Parameter "non diffuse" to
macro instance ,, it seems work,, why?
and,, if I hope to make switch, ('specular only or diffuse only or both etc)
as same as daz light)
I feel I may need to add new parameter about no diffuse,, but,, if I just add new parameter in user macro,
then connect it to "no diffuse" of parameter,,, why it work correctly?
DS can auto add code for non diffuse too? I check initallization code,, but there seems no code about
"specular on or off" and "diffuse on and off" ,,, it is alrady written in User parameters?
but I do not need connect it,,? (eg about diffuse on )
Or need to add new parameter in envlight2, (maybe I can use name as I like)
then just connect it to User parameters , Non diffuse, and Non specular?
Question2
it is silly quesiton, I know,, but about light max dist, max value.
I check tutoriall, then Kettu suggest,, to keep max,, I like to do what I told ^^;
then try to input the value ,, but I can not clear see the correct max value.
it seems "1e + 010" or 1e+O10,,, etc,, I understand "e" ,, then it is same,1* pow(10,10)?
Your best bet would be to try controlling the __non-parameters the way I did to __inShadow in this mini-tutorial (it's just that __inShadow is "output varying color", and __nondiffuse and __nonspecular would be "output uniform float"):
https://mustakettu85.wordpress.com/2015/04/15/3delights-physical-sun-into-daz-studio-a-yet-another-shader-builder-mini-tutorial/
I haven't tested myself if that would work for these parameters in particular, but why not.
Yes. 1e3 is 1000, for instance.
Hi kett,, :lol: thank you to teach me clear all what I asked.
and you show me how to learn too . It is very useful !!
You're most welcome, Kitakoredaz =) Enjoy!
Two painted HDR maps originally posted to the 3DL lab thread. These are very simple, but have decent dynamic range. Can be used in any software that supports lat/long HDR panoramas for lighting! Try them with the Envlight2 in 3Delight, or in the render settings in Iray.
These are released under the CC0 licence = public domain. Use as you please =)
http://www.mediafire.com/download/9tttd9yffpzorrr/test_10steps.exr - brighter one, softer shadows
An interior render by Mjc: http://www.daz3d.com/forums/discussion/comment/969419/#Comment_969419
http://www.mediafire.com/download/0c1j2hqhb6krz27/pinsun.exr - darker sky, shadows a tad more sharp. Could be useful for moonlit scenes.
New freebie of mine up on ShareCG:
CapForHair - a conforming figure to grow LAMH hair on. Helps work around the "mixed up mesh resolution" bug that can happen with LAMH, plus makes it possible for different Genesis generations to wear the same style without much effort! Three .lmh presets and a basic hair density distribution map for your creations are included.
http://www.sharecg.com/v/84596/view/21/DAZ-Studio/Mk85-CapForHair-plus-LAMH-presets
So, can the "vanilla" DAZ Studio / 3Delight combo do more or less useful GI (think feasible timeframes and no point clouds) these days, now that UE2 raytraced bounce mode is obsolete?
Turns out it can. Shader Mixer apparently works.
Here is a scene for enthusiasts to pick apart. It uses DS default content - you should have the original Genesis with its "essentials" installed for there not to be file loading errors.
Switching "progressive mode" off is NOT RECOMMENDED.
There is a ShaderMixer spotlight with physically plausible falloff and a ShaderMixer indirect light camera.
ShaderMixer lights cast photons, unlike most other DS lights. It may speed up your renders somewhat because the IDL camera will automagically switch to photon-mapped IDL. But the speed gain may be not that huge - because 3Delight has a fast raytracer (and you only get this raytracer in DS by using the "progressive mode"). So you could try the vanilla DS lights, too.
A word of warning: using AoA Advanced Spotlight and Distant lights might produce wrong GI because they use "non-standard" shadow calculations.
"Default Camera" and "FaceCam" are basic DS cameras, for setting up the scene. CamIDLPM is the IDL cam, the one you render through to get global illumination.
There is a primitive sphere with inverted normals around the scene; it is what the light bounces off. Any skydome should work, in theory, if its normals point inside.
Make sure the CamIDLPM's "max distance" is sufficient for the rays to hit your skydome, though.
If you're rendering interiors, you may get away with simply pointing a distant light at the windows if there are any.
Use "classic" point lights and spotlights with quadratic decay (2) for your interior lights. Area lights with quadratic decay should also work.
The dude's skin is also a ShaderMixer network - very simple, just the very basic stuff. But at least it has Fresnel attenuation on the specular. I can't live without it =)
Render times on an old Core2 Quad Q9300 CPU:
No IDL: 1 minutes 46.60 seconds
With IDL: 13 minutes 12.32 seconds
With IDL, and a DS vanilla point light instead of a shader mixer spotlight: 18 minutes 6.46 seconds
Licence:
You can use the ShaderMixer cameras, materials and lights from this scene in any commercial or personal render. Credit not required.
You can modify and redistribute the ShaderMixer networks, for free or commercially. Credit _required_: put "original shader mixer network by Mustakettu85" somewhere in your product documentation. // yes they are simple, but it did take me an hour to connect the whole spaghetti mess //
If you're so inclined, you can copy, modify and do whatever you want with the UberSurface presets from this scene, credit obviously not required because they're extra simple.
If someone asks me to, I will gladly package the material, camera and light presets separately.