Adding to Cart…

Licensing Agreement | Terms of Service | Privacy Policy | EULA
© 2025 Daz Productions Inc. All Rights Reserved.You currently have no notifications.

Licensing Agreement | Terms of Service | Privacy Policy | EULA
© 2025 Daz Productions Inc. All Rights Reserved.
Comments
The Cubic Interpolation Tweener (I can't recall what it's called internally within Daz Studio) is already present in the software, but not accessible to users, which is a vlauable type of tweener. It's a bezier which is "clamped" from going above the highest value and below the lowest. This is the tweener that aniMate 2 uses when we do our animation work in it, rather than in the timeline. I believe one needs the paid version of aniMate 2 for this sort of work. I've had the paid version since my first Daz 3D purchases, so I'm still a bit unclear as to what the free version excludes.
I'm in the position that: I love Daz Studio for what it gives me as an artist - the compatibility with the store assets (which are perfect for me) with a wonderful set of options for the final render.
Since I've started collecting Daz 3D assets, there has always been two major players in helping me to take this content from Still images to fun videos - GoFigure and Posermocap (now Reisormocap).
Whether using aniMate 2 simply to stitch multiple motions together, edit them with partial aniBlocks, or to use any of the other amazing beneficial tools... aniMate 2 has been the glue that keeps my Daz Studio experience (as an animator) happy!
Yes, it could be argued that - since I'm using other people's 'canned' motions, that I'm not actually an animator at all. And if anyone takes that stand with me, I'm fine with it. I consider myself to be "Part of the Animation Team Pipeline" anyway, because I am never leaving the results of these animations as they are 'out-of-the-box'. I do an awful lot of additional animating to these motions - using the motions themselves as The Starting Point of my work - the original motion-capture data provided by the motion-capture team. I am the one responsible for completing the animations for their final scenes.
Facial expressions including involuntary facial musculature movements and eye focus, hand animations, integrating with the scene. And before that takes place, being responsible for the choreography of the scene's animation for that character. "Are the arms doing what they're supposed to be doing?" Most of the time... no. So I edit all of that myself.
Instead, I'm using my own simple dials that I use to edit any rotation of any joint of the figure. These dials take literally seconds to create after we're accustomed to making them. And since I save them as morph assets for the Genesis base figure, I only have to create them once. They're always there for me after that!
If I have a correction to make for several joint rotations that's always cropping up, I make a dial with those corrections on for all joints involved - so I can make the corrections with one dial throughout the timeline.
Now, since these dials are never used by original motion capture data, they're Always blank along the timeline until I use them to make a change. So the tweeners and groups of tweeners of my own work is easily spotted on the timeline compared to the blur of having a key on every frame (like we get from motion-captured data).
So now I'm free to set those interpolation methods to best suit how they affect the outcome of the animation.
BoneTech3D, Havanalibere, Mocap Online, SKAmotion, GoFigure, Reisormocap, SimonWM, and ThreeDigital, here at Daz 3D (I feel that I'm missing someone), have excellent offerings - so I collect them all. Also incorporating Mixamo animations has also become an important part of it all.
Utilizing aniMate 2 is a big part of what makes Animating in Daz Studio such a doable thing. So much so that I can't imagine myself doing it any other way. So I would Love to see GoFigure provide updates for this amazing tool, but even as it is now... I love it!
Many of the things we do with it can also be done in the DS timeline (except for the excellent option of previewing animations before committing) but with a Lot more time and effort.
The link in The Power of aniMate 2 image on the right is a rather nice page for discovering the multitudes of benefits it gives us - including the User's Manual and official "Show Me" videos of many of the available functions. The course itself, available at Daz 3D, is a recording of myself going through many of these benefits for practical examples within our animation workflow, but the page, along with its several sub-pages and links to the forum thread, is an invaluable resource all in its own right.
This month's The Creative Cart (date yet to be established) I'll be demonstrating some creative ways to work with Linday's dForce hair products. Along with that topic it's very fitting that I show off some of my Havanalibere animation collection, and we'll also see a bit of my custom dials in action. Since I've already made a course describing in detail how I actually make them, the making of the dials is not covered. But their use is undeniably the Cat's Meow when it comes to fine-tuning. I mean... it's so second nature to me as you can see if you ever see my workflow in progress. Simple - Fast!
These Creative Cart webinars are free. So if you're interested in seeing how I work in Studio, come on in. They're fun little two-hour shows that are Packed with fun Daz Studio workflow content! :)
Looks like it'll be Saturday, November 23rd
The Creative Cart - Episode 009 - dForce with Linday in the Urban Future
My biggest problem is that DazStudio has default overshoots and undershoots on all keys when motion is applied.
First, I have to manually erase all of them.
For long motions, this can be a daunting task.
In Adobe's After Effect, if I create a key in the middle of a motion curve, the curve does not change.
This is because the length of the control handle is not specified by itself just by creating a key.
However, in DazStudio, if I create a key in the middle of a motion curve, the curve will be changed by default by inputting the value TCB=0,0,0.
This must be adjusted one by one to restore the curve to its original state before the next operation can begin.
Overshoot and undershoot are fine as long as I can put them on arbitrarily when I want them.
Currently, all keys have it by default, which is a big stress.
Moreover, the values are not usable as they are, and must be readjusted.
This is a very complicated hassle that has nothing to do with creativity.
That's where I really miss being in Carrara.
In preferences, we can set our default tweener used on new key frames.
Daz isn't wrong in that the Bezier curve (TCB) is a popular default for many purposes. But I always preferred my default to be linear, then I'd change the keys I wanted to become Bezier or any of the other many tweener choices it has.
Also in Carrara, even the Linear tweener has ease-in and out options.
For the Carrara 8.5 Upgrade, it was Daz 3D devs who put a lot of sophisticated changes into the animation tools.
It would be really cool if they could put some of that love into the DS timeline tools!!!
...or if they'd give us an "Export as DUF" option in Carrara
Carrara has a built-in NLA (non-linear animation) system.
When coming from Carrara to DS, it feels a lot like what GoFigure was doing when they made aniMate 2, is that they were putting a simplified version of Carrara's NLA system into DS.
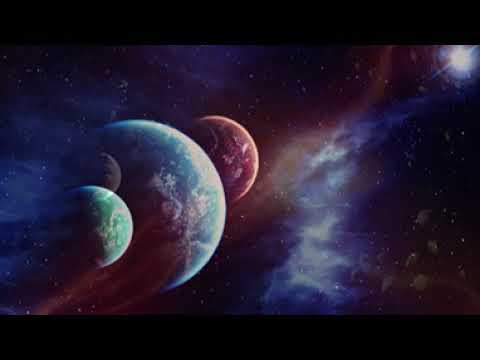
These are 360/VR renderings of Sci-Fi HDRI product.

Very cool!
360 Animation - ATVE Mods SIV Dragon with Genesis 8 Female wearing Nanosense Cyber Suit. Exterior:Terradome 3 IRAY.
Awesome! But 360 is awkward for viewing something like that, think. I wonder if it's worth all of the extra time it must take to make it 360?
Just wondering
Just the sort of answer one hopes to hear! Very cool!
So, the time it takes is just what it is, and you're launching your workflow - learning and growing as you go, as am I.
Isn't it a Blast?!!!
So you must be rendering animations using a spherical camera. I render my characters on their own, individual pass - nothing else in the scene but a really nice HDR dome for lighting. I bet that combining some of my stuff with some of your stuff could have a really fun result!
I finished collecting the entire iReal collection from ThePhilosopher, and use these to render additional passes for VFX layers.
I even usually render the sky as its own layer, using the character's film camera to render only an HDRI sky.
this was done very quickly, but does a pretty good job of showing what I do:
Yes, everything is shot with the spherical camera, but like you mentioned regarding yours, rarely all at once. In most cases the animation is layered just as you mentioned. The static objects are typically rendered and applied as HDR to the dome environment map. If midgroumd static objects are needed, they are rendered. Finally moving objects are rendered. Everything is then stacked in an typical video editor to compile and add sound.
Other static tricks are used, the short portion of the rider in the Skybike is static. The character blinks once with an identical render of the scene with the characters eyes closed instead of cranking out 30 or so frames for a single blink. Everything is shot at 8K with as few samples that I can get away with keeping in mind that it's going to get boiled down to 4k. This usually hides any speckling on the 8k image. Originally the sperical imges were edited as in a 360 view, but I discovered this was not required. Except for special instances, it's eited just like any other video and the 360 data is injected after the video is completed and that just takes a few seconds.
But 360 vs Std is worth some testing. The skybike in the previous video was a seperate layer of 900 frames. Last night I set up and started rendering a 900 frame std video. It's not an identical scene, but it should give a vague idea of time use my comparing the time/date of the rendered files. I have not pulled up tht machine to check it's progress this morning, but the drive light tells me its still cranking away. It's 6 hours into the process and back of the napkin math says it's going to take at least 7.5 hours to finish. I'm keen to see the results of the two sets of files.
(I'm also on a brand new platform. My previous computer was a 12+ year old I7 (8 core) with a joke of a video card. My new platform is a 20 core I7 with an nVidea 4060. So I'm stretching it's legs.)
I just got that PC too - after I woke up last Monday to a fried motherboard. Crazy seeing 28 threads on the CPU!
Mine is very similar but has the 12GB 4070 Ventus X2 GPU - made by ABS
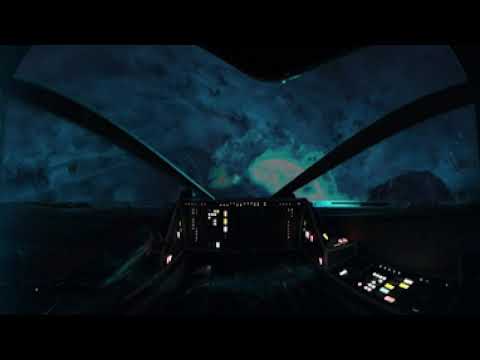
This is a 360 animation of Starship R01 being piloted by Victoria 7 to the asteroid based Ensk Station.

Ringing in the new year with Sylvia 9. This is the first 360 image I've rendered that I can preview in full 360 thanks to my brother gifting me an Oculus 3s for the holiday.

Do you have some suggestions about how to fix in animation in Daz Studio when hands and skirt go inside the body?
Dforce for the skirt pose parameters for the hands, I use arms up or forward or both
Thanks a lot. I will probably choose the other animation clip to play with.
That is So Freaking Cool!!!
The tough part, I think, would be having all of the people and non-parked vehicles perpetually in a looping motion
...but possible. Just set it up so that walking people start from behind something and end up behind something else - same with vehicles. An old animator's trick. Could possibly get away with something (maybe?) as short as 30 frames. But even a little longer would still be worth the render time, I think