Hugely disappointing first render. Obviously, need help here . . .

Hi All,
Well, completed my first render, and after hours of waiting, hard to express how disappointing the results are.
I have screenshots here.
Using UberEnvironment2 preset.
with a couple of distant lights added and a spot.
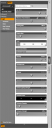
Here's the Uber2 settings.
Pretty much default. I don't think I changed anything. At least I don't remember changing anything.
Screen_Shot_2012-07-01_at_12.17_.10_PM_.png
509 x 1252 - 87K
Post edited by solarview on
Daz 3D is part of 
Connect
DAZ Productions, Inc.
7533 S Center View Ct #4664
West Jordan, UT 84084
Licensing Agreement | Terms of Service | Privacy Policy | EULA
© 2025 Daz Productions Inc. All Rights Reserved.
Comments
Here is my Render tab settings. All default except for size.
Here is how the preview looked in Photoshop through 3D Bridge to Photoshop.
And here's how the render looked after hours of rendering (maybe 4)
So where did I mess up here???
A quick follow-up.
In clicking around Studio looking for an answer, I clicked Uber2 'OFF" in the scene tab. The result was, the preview now looks much like the final render i got. This would seem to imply a bug with UberEnvironment2 and Studio 4.5 on the Mac.
Also, trying to spot render with Uber2 on, it was taking a really long time, as in 10 minutes and only 25% complete, (Head and shoulders only).
When I turned Uber2 'OFF', the spot render suddenly on;y took 10 seconds.
Here's the spot render with Uber 2 off.
You need to change your Uber 2 settings
No need for bounce that will increase your render times dramatically.
Occulsion samples need to be about 64
Occulsion strength needs to be higher try about 80-100.
Do test renders at smaller sizes and without the hair.
Your render settings could also do with changing - try changing your shading rate to 0.2 or lower.
Thank you for the feedback.
So, are you using the term 'Bounce' interchangeably with Occlusion?
I don't see a 'bounce' setting on either tab.
And wouldn't increasing the Occlusion Samples and Strength, add processing time? In my brain, higher slider settings, mean more. Is that not the case?
Also, that doesn't really explain the difference in my Preview Render in PS, and the final output png. As you can see, it's pretty huge.
try turning Maximum Trace Distance, on uberEnvironment, down to something like 30 or so -as it is, anything out to 5 metres is going to reduce the light falling on the surface, which is giving you really dark shadowing of the inner areas of the model. Turning it down may increase render speed, and should also keep the darkening in very restricted areas while allowing more open areas to catch more light/
The Bounce Light (GI) is the option you have selected under Environment Mode - it means that it is trying to account for light bouncing off one surface onto another. Very realistic but also very slow, and since the model is floating in space there's very little there to bounce light onto her and so she's dark.
So Maximum Trace Distance' is equivalent to the term Light Throw Distance?
In the old forum there was a thread by adamr001 about Learning UberEnvironment 2. Hear is a link: http://forumarchive.daz3d.com/viewtopic.php?t=173382&flatnum=1 Unfortunately I don't know how to get the photos in the old forum to show up any more. Maybe others can help with that.
He also provided a sample light set that I have found to be very helpful. The link he provided was: http://daz.tall-tales-racing.com/resources/freebies/amrlights/AMR_MAT_Setup_Lights.zip
I suggest installing those lights and trying that as a starting point. Here is a render I did with that simple light setup. It is a PNG file. I hope that shows up in this forum.
Thank you, Barbult. I'll definitely check that out.
Really nice render, too. :)
As I have found no glossary of terms for DAZ terminology, what do these light 'shadow' terms mean?
What is 'Deep Shadow Map' versus 'Raytraced (Software Only)' ? The preview, looks pretty close to the same. Is one better, or faster?
What is 'Shadow Bias'? Seems to control the lightness of the shadow. Is that pretty much it?
Just curious, Barbult. How large is this file you're showing here? And how long did the render take?
Just looking for reference points. Thanks.
Hey Richard, another question for you on this.
You had explained (earlier) that it defaulted to 500. And you said that was for, like a big scene such as a spaceship, or something like that. And you said take it down to 30 or so. Is that number a measurement like in feet or meters? So '30' would be 30 meters from the center of the scene? Or is it an arbitrary number?
In my test scene, I'm doing a character to output to a Photoshop file. So would a setting of 10 0r 15 be plenty enough for the single character?
It's just kind of crazy, that all these sliders with their DAZ Studio-related terms, isn't explained in detail somewhere. As in, slider by slider down the list. Or did I just miss it? There is a 'Help Menu Glossary', but it is very limited.
In reference to Adam's preset. I loaded it and notice that the 'Max Error' setting is at 0.10. I had notice in my default render, the Uber2 setting is at 0.80. Is this as it sounds, a multi-pass error correction feature? As in, a higher number is going to dramatically increase the render times? His preset is definitely moving quicker. Still slow, but quicker on the Spot Rendering.
Hey Richard, another question for you on this.
You had explained (earlier) that it defaulted to 500. And you said that was for, like a big scene such as a spaceship, or something like that. And you said take it down to 30 or so. Is that number a measurement like in feet or meters? So '30' would be 30 meters from the center of the scene? Or is it an arbitrary number?
In my test scene, I'm doing a character to output to a Photoshop file. So would a setting of 10 0r 15 be plenty enough for the single character?
It's just kind of crazy, that all these sliders with their DAZ Studio-related terms, isn't explained in detail somewhere. As in, slider by slider down the list. Or did I just miss it? There is a 'Help Menu Glossary', but it is very limited.
The unit is cm - so 30 would be about a foot, 15 about 6 inches.
This image was 800 by 628. I think it took around 15-20 minutes to render. I probably had my advanced render settings at pretty high quality; I don't remember specifically. I seldom render a final image at default settings. I will crank the Shading Rate down to 0.3 or so, and the Pixel samples up to 6. It might be overkill, but I have time to wait. Hair takes a long time to render, depending on which hair you have chosen and what surface settings are set. For test renders where you want to evaluate the lighting, turn the hair visibility OFF (as others have advised). Turn up your shading rate (even above 1 if you want to) to speed test renders. Watch out for Progressive Rendering; that can take a long time to finish. It is OK to let it run a cycle to two to get an idea of how it will look and then cancel, but waiting for a progressive render to finish takes too long IMHO. I once accidentally did a progressive render to an image file and it took ages and the result did not look very good.
One of my pet peeves is that I don't know any way to find out what settings were used for a specific render. If I reopen the saved scene, DAZ studio doesn't restore the render settings used with that file. It just remembers the settings used for the most recent render, even if it was a different scene file.
Awesome, Barbult. Hugely helpful. Thanks!!
Hey Guys,
Huge step forward! Or at least I thinking so.
I downloaded the lighting scene that Adam had created in the thread you all sent me to.
I loaded it up and took a look at what it was doing to the image. And more importantly, what the settings were, compared to the settings that the UberEnvironment2 had been defaulted to. In which I was have so many problems with. I had already changed a number of them to the suggestions you guys had put out there. Including the Maximum Trace that was defaulted all the way up to 500. I took it down to 30.
But the other big ones it seems, were the 'Shading Rate' and the 'Max Error'. The default Shading Rate is 128, Adam had it set down to 8.00. And the Max Error setting was defaulted to 0.80. Adam had it down to 0.10.
Well, after making these adjustments, I'm now getting the same renders done in about 15 minutes. Woohoo!! :)
I'm going to go through the rest of that thread over the next day or so. Hopefully there's a lot more knowledge to be had.
And thanks again to Richard for giving me the tip on viewing the images from that thread. A little convoluted, but it works. Yay!
Thanks again, guys. Can't say enough about how cool the folks in this forum are.