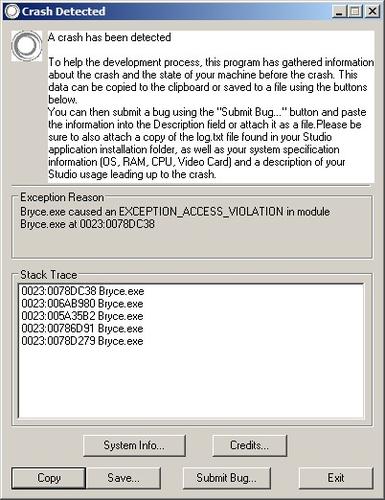
Bumpyness crashes Bryce every time.
 eireann.sg
Posts: 0
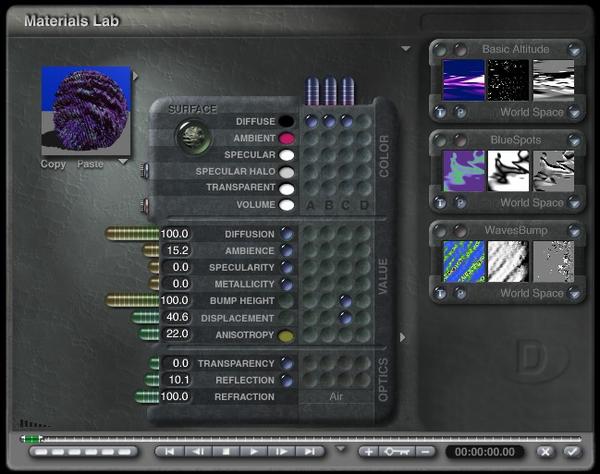
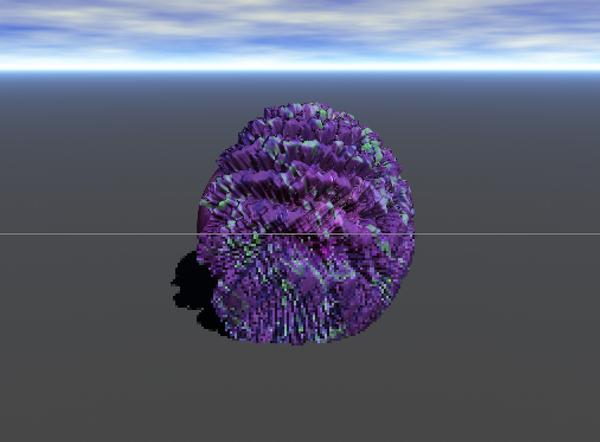
Here the partial render, the material settings and the crash report.
If I select the second channel it doesnt crash. Only when using the third one possibly due to higher complexity?

bloop_025.jpg
402 x 522 - 61K

bloop_024.jpg
649 x 513 - 87K

bloop_023.jpg
1013 x 747 - 82K


Comments
Displacement is most probably the culprit - and it is used for the third component. Displacement doesn't behave stable.
Maybe I should put the bump in Channel B and displacement in C or vice versa, but not today.
I am tired now playing around, besides its cold outside. We have got rain and the temp has dropped to a freezing 24 degC. Have to see where my sweater is.
A freezing 24c hmmm, we have a balmy 1c here at the moment, had dropped to -8c overnight.
Displacement and bump are entirely different features. Bump uses shading to create the impression of added geometry, while displacement literally creates new geometry. It is in the generation of the added geometry that Bryce gets fouled up with displacement. Bryce uses a micro-polygon displacement that is controlled in the Attributes tab at the very bottom. Only once you have enabled displacement in the material lab does this option become ungrayed out in the attributes tab. The smaller the microplygon size the more polygons are created and the more ram is required. Try using larger settings like .05. You only have a few moments from the time you first enable displacement to quickly get over to the attributes and lower the default micropolygon quality from default .0.1 to a larger setting.
Displacement never quite got completed in the most recent dev cycle. Clearly it is the top of the list for the next cycle if that indeed happens. There's the short and the skinny.
Thanks for dropping in, Rashad. I was sure you'll be of better help than me.
Temperatures - a still warm -10C in the morning. This will drop considerably as the winter progresses.
Graham reported that displacement was mostly usable on one of his single-core P4 machines. And suggested that setting the priority to low might offer improved stability for multi-core processes. Note "improved" - you will still experience frequent crashes with displacement, but with care you might get to complete a render. It's a interesting feature, but somewhat broken.
@Rashad Carter, thanks for the detailed explanations.
I found that I have to be really fast to change the Attributes setting after applying a displacement material or it crashes.
It is not easy to do that. First you have to get out of the material editor, then quickly move your mouse to "A" and by the time you have adjusted the value Bryce has usually already crashed.
Is there a Preference setting that can be used so that the Micropolygon setting doesnt use 0.01 in the first place?
My computer has 12 GB ram but guess Bryce cant use more than 2GB...
for the temperatures: Here in Singapore we are not used to having such low temperatures and I regretted so many times not having brought over a heater last time I went to Europe.
if you make a mat that is a flat color and set displacement to that (and leave displacement at 0) you can go to attributes and change the micro polygon setting THEN go in and make the correct changed to the dispalcement settings. I've had that work with ok success
but yeah displacement tends to crash bryce, especially if using alot of the premium render functions.
Thanks for the tip:
I think a much better solution would be to introduce a number field in the MAT editor to adjust that.
If you want to use the same displacement map for many different shapes it might be a lot of work changing the Micropolygon setting for each shape separately.
Besides, if you ADD a new material with displacement you always have to create a dummy material first to adjust the Micropolygon setting and then put the desired material onto it.
BTW: does someone know why the Materials lab has the size as if it was made for 640*480px screens?
It's because of computer monitors being so small back then with very few pixels compared to now. But the new problem is people wanting to run Bryce on tablets and things, such users have the same screen resolution demands as computers had back in the '90s when Bryce was being released, small screens. So in my opinion we are stuck with these buttons for a long time to come. We've already begun to see people upset that Bryce labs dont always fit and display properly on tablets. As a desktop user I have little patience honestly for the needs of tablet users, but then I'm just a closed minded selfish prick of sorts. Balancing the interface of Bryce over the next releases will be interesting to see how it goes. it if goes.
I think more serious people dont use it on tablets and not even on laptops.
But then: There could be two setups, one for small screens and one for bigger ones. BTW: dont tablets have 1024 px resolution?
I think displacement can be nice. The lowest setting for Micropolygon I can use is 0.02 with a picture as displacement map and I think it looks best on spheres. I tried cubes but they give funny results and terrains dont give anything.
I think that's the best displacement image I've seen rendered in Bryce yet! The high quality lighting really brings out the subtle geometry. I'm curious, how long did it take to render?
Extreme Displacement.
Main drawback, render time.
An odd thing happens when I convert the sphere to a cube. The Micropolygon attribute defaults to 0.10, when I change it to any other number, it makes no difference, the display works and I click the tick to OK the attributes window. NO change to object and when I enter back into the attributes, it has defaulted back to 0.10.
I think that's the best displacement image I've seen rendered in Bryce yet! The high quality lighting really brings out the subtle geometry. I'm curious, how long did it take to render?That took long. More than 50 minutes. Since I am impatient I went away and did something else while it rendered.
I used a self drawn BW image and set displacement to 1. Any more and it looks weird.
Happy you like the pic although there is still a small gap in the structure. Guess it needs more fiddling around to make it look seamless.
Less extreme displacement.
2 channels used to texture, including bump and displacement.
Displacement set to 16.9.
Rendered with TA, soft shadows and DoF at 36RPP
Render time; 30 minutes.
Here a more seamless pic of my previous version. Smaller because I didnt want to wait as long as before..
Another interesting thing about Displacement (I've been playing with it and testing it all day).
Once you have a successfully placed displacement map on a primitive, you can then add any texture from the library and even though the displacement doesn't show up in the Mat Editor, it remains on the primitive and seems to be stable and rendering quickly.
Yes, it was very odd.
I pushed it and pushed it and it did everything I threw at it. When I duplicated the object, it's duplicate didn't have the displacement.
Then a thought occurred to me, I saved the document and quit Bryce, then re-opened it and the displacement had gone leaving the sphere a rough mesh sphere with visibly flattened faces.
I was thinking of a new and interesting way making new shapes.
That displacement function though is interesting is giving me the creeps. :)
BTW: my spheres look so clean because I was using a bitmap image.
I found out some more weirdness.
Yes, if you put in a displacement and then change the material to something without displacement then the displacement remains.
Another weird thing is: If you use the Classic Checkerboard material both for your colour and displacement, the colour and displacements dont match up.
It only looks nice if you use displacement and ether a single colour or some totally different colour pattern.
I reported the failure for diffuse and displacement to match up but you can offset the texture make it match. I can't find the files I did on this but I seem to recall it's something like adding 25 BU to the X offset.
Recently when I was going through the Modo documentation on displacement I found a note that states something to the effect that models made from tri-polys can produce "undesirable and/or unreliable" results and not recommended for displacement. Since objects in Bryce are all procedural or tri-mesh this may be the root of most of the problems.
where do I find that x-offset. I am still new to Bryce.
I found the nicest results can be obtained by BItmap images. You can decide what to show and everything is evenly high.
I think you look for this - though I inadvertently marked Y instead of X. You have the transformation tool for each texture in the mat lab. On top is size, middle is rotation and bottom is offset. Just click on the top left button of the texture.
Thanks Horo for posting that.
I also found my test file and of course my memory was way off (LOL).
Here's the test image and it's -30.5 Y offset.
I woudnt have thought to find that there. Seems there is still a lot to discover for me in Bryce.
Sure. Bryce is also an adventure game. Click on everything and find yet another treasure.
Been also experimenting a bit with displacement, which works without crashing Bryce if you set the render priority to Low before you displace. All primitives seem to work, except metaballs. The material used for displacing (from the upcoming p43-Metals 2 product) was not a fortunate choice. Render times with Obscure Light and Obscure Glow were up to 8-1/2 hours and the result ugly due to the coarse micropolygons. This one is lit by the specular convolved HDRI (which will come with the p43-Metals 2), a bit of sun to the right and a radial to the left. The ALST was set in front of the camera to prove that what we see is displacement, not bump. Rendered in around an hour.
The first picture is the anaglyph, the second one the 8-1/2 hour render with Obscure Light and Obscure Glow.